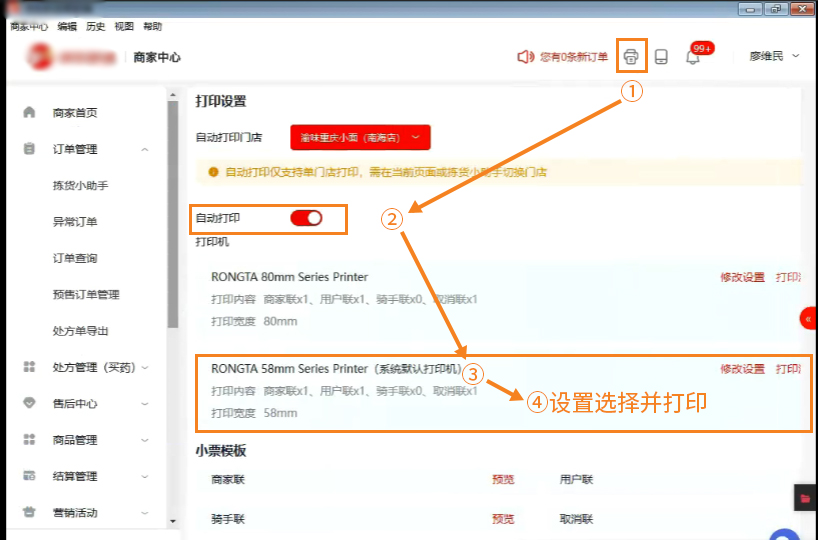
感谢您访问我们的网站,您可能还对以下资源感兴趣:辽阳揽荒食品有限公司
成人九九,亚洲熟妇色自偷自拍另类,岳乳丰满一区二区三区,国产va,亚洲中文天堂,A片网,www.51vv.com,亚洲熟女无码在线
网站地图
亚洲丝袜精品在线视频
超碰人人干
国产三级制服丝袜
国产老熟妇
国产精品秘?国产A级
男人的天堂色偷偷
jizzjizz亚洲
精品va在线观看
人妻少妇被猛烈进入中文字幕
成人AV天堂
国产高清A片
影音先锋资源在线
www.jizzjizzjizz
3Pav图
久久久久久AV无码免费网站动漫
97福利
男人天堂一区
97成人精品一区二区三区狼人
freeAV爽视频
亚洲天堂视频在线观看
国产va在线观看
日韩精品人妻中文字幕有
一区二区三区四区视频
欧美又粗又大又爽
亚洲中文自拍
熟女中文字幕丝袜日韩
欧美在线视频99
海角社区91熟女丝袜脚国产
亚洲精品影视
亚洲精品二区
www.youjizz日本
亚洲无码人妻
亚洲无码mv
麻豆乱码国产一区二区三区
亚洲~V
日韩精品人妻中文字幕不卡乱码
超碰碰97
国产v片
三成人免费看
成人av天堂
久久av高潮av无码av喷吹
欧美A√
欧美日视频
成人日本有码在线
内射视频在线观看
午夜激情网站
午夜性福利
metart亚洲裸体中国
超碰免费在线观看
6080啪啪
狼友福利在线观看
女人的天堂av
91视频播放
国产av制服丝袜
A片A级毛片
蜜桃视频在线观看18
av无码不卡
69堂在线观看线无码视频一
69精品人人人
国产制服丝袜在线视频观看
超浪熟女在线
人人超碰在线
亚洲成人色情
亚州成人
免费AV网站
久久久久久AV无码免费网站动漫
熟女少妇18
富婆熟妇熟女二区三区
苍井空大战黑人
jizzjizz
3P在线
77777色
91成人无码
亚洲激情图片
亚洲精品字幕
91在线视频播放
日本久久中文字幕
日韩成人社区
99国产视频
欧美牲交视频
91网站免费
台湾色综合
成人自拍中文字幕
97人人看
26uuu亚洲
国产男人天堂
国产V视频
91精品无码
又粗又大网站
亚洲.无码.制服.日韩.中文字幕
久久久黄色片
国产av制服丝袜
久久内射
久久毛片ddd
国产精品性爱
日韩精品久久
jizz网站
伊人99
国产亚洲精品??码
夫妻自拍偷拍
国产老熟女伦老熟妇露脸
蜜桃视频在线观看18
亚洲国产精品狼友在线观看
久久无码专区
亚洲最大成人综合网
欧美a在线
国产精品免费无遮挡无码永久视频
性中国熟妇
丰满午夜人妻无码AAAA
亚洲熟女VS国产对比
亚洲综合社区
国模久久
69精品人人人人人
日韩久久精品
婷婷激情综合
超碰人妻97
****亚洲成a人片第1集
亚洲123
海角社区91熟女丝袜脚国产
成人硅胶娃做爰无码www
日韩欧美一级特黄大片
jizzjizzjizzjizzjizzjizzjizzjizzjizz
中日韩三级片
久久久久久久久久8888
羞羞成人一区
色偷偷免费视频
国产va影院
熟女亚州综合
激情图区
国产熟女口爆
久久久久久久av
jiZZjiZZ欧美69
黑人与亚洲av
老鸭窝成人
樱花飘落视频素材
国产精品高潮呻吟AV
一区二区三区精品
人妻少妇精品久久久久久0000
亚洲中文字幕版
久久久久久av
v中文在线
欧美第3页
不卡的无码AV
上海集散中心旅游官网订票
天海翼一区
亚洲丝袜精品在线视频
一区二区淫网
密臀av
伊人九九网香蕉精品
激情综合久久
欧美福利网
亚洲男人天堂
欧美另类高清videos的特点
国产精品被狂躁到高潮
亚洲无码人妻
A片国产在线
91无码国产成人精品
视色网
亚洲激情AV
jizzjizz亚洲
人妻熟女在线网址
无遮挡网站
人妻?制服?丝袜
jizz国产
老外AV
制服丝袜亚洲在线
超碰免费人妻
男人亚洲天堂
88XV日韩
www.youjizz日本
国产黑丝袜在线观看视频
3p视频在线观看
天天操天天干视频
日韩色区
亚洲av熟女
亚洲资源在线
中文字幕在线v
亚洲人妻中文字幕
黑人videos特大hd粗暴
国产精品天天搞天天搞
69精品人人人人
久久av高潮av无码av喷吹
愛爱视频在线3
免费A片国产毛无码A片
熟女中文字幕丝袜日韩
青青久草
欧美精品网
波多野结衣无码视频一区二区三区
AV无码中文
福利姬白浆AV导航
99麻豆
男人的天堂色偷偷
www.亚洲精品长腿丝袜
aV无码av高潮aV三区
精品自拍视频
日韩午夜福利
亚洲熟妇色
精品人妻少妇嫩草AV无码专区
巨乳无码
精品人妻一区二区三区在线视频不卡
色婷婷成人
精品日韩在线视频网站
中文字字幕在线中文乱码
91视频污
亚洲成人av
97久久精品人人澡人人爽
精品va在线观看
岛国一级
精品自拍视频
91视频精品
xxxx欧美
亚洲色频
久久18禁
亚洲一区av
日本精品一区二区
国产v专区
岳乳丰满一区二区三区
亚洲中文字幕AV在线
人妻无码精品
丰满少妇被猛烈进入无码
久久久久久亚洲AV无码专区
欧美福利极品
国产成人精品AA毛片
日本中文字幕色
麻豆av在线
亚洲一区二区av
老司机免费视频
欧美《熟妇做爰》HD
久热av性爱在线观看
久久中文无码
国产盗摄人妻精品一区
黄色日本视频
91精品国产成人观看
制服丝袜在线精品
最新亚洲中文字幕在线
中文字幕少妇人妻
大香蕉一区二区三区
自拍偷拍亚洲
蜜桃视频在线观看18
三级片导航
浪荡干片网在线观看
91在线观看
人人人操
国产成人av
不卡的无码AV
av青青草
亚洲第一成人无码A片
亚洲区中文字幕
久久精品
一区二区三区欧美
亚洲中文字幕版
国产成人一区二区三区小说
www.亚洲成人
日本无码中文
国产成人精品二三区波多野
日韩欧美亚洲
亚洲中文字幕日韩
国产精品va
亚洲精品播放
91精品无码
影音先锋成人
亚洲狠狠
欧美日韩xxx
欧洲一区二区三区
四虎在线视频
久久av高潮av
午夜成人三级
亚洲18禁
亚洲AV无码久久精品色欲
精品伊人久久久久7777人
中文日韩欧美
欧美另类潮喷
最新亚洲中文字幕在线
国产成人A片
黄色www
无码人妻中文字幕
av黄色
艳妇乳肉豪妇荡乳AV无码福利
亚洲色人
亚洲熟女字幕
国产老熟女伦老熟妇露脸
亚洲国产精品成人网站
少妇视频网站
国产精品AV在线观看
日本无码中出
亚洲熟女免费在线视频
久久亚洲熟妇熟女
97大香
内射干少妇亚洲69XXX
精品a片
桃色综合网站
国产3P成人在线视频
69堂在线观看线无码视频一
波多野结衣av88综合
国产精品V在线播放
jizz免费
欧美成人无码大胆A片软件蜜臀
91丨人妻丨国产丨丝袜
国产视频拍拍拍
四虎论坛
亚洲v?a
久久er99热精品一区二区
少妇综合网
777欧美
亚洲老熟女@TubeumTV
日本精品视频
精品少妇
久久久久久AV无码免费网站动漫
最新熟女国产
熟妇导航
伊人福利导航
亚洲少妇少妇少妇
国产精品???A片带套
麻豆色漫
蜜桃视频婷婷狼人看在线视频
中文字幕在线一区
人妻熟女在线网址
专干老熟女A片
超碰人人人人
无码?人妻?在线
v中文在线
jizz亚洲
亚洲av自拍
一本色道久久综合亚洲精品按摩
欧美日韩xxx
亚洲成A
变态另类AV
a网站免费观看
超碰人人在线
不卡黄片
亚洲日韩?国产丝袜?在线精品
国产乱子伦日B视频
中文字幕av久久爽Av
国产中文在线
熟女在线国产
国产V片免费A片视频
制服.丝袜.亚洲.中文.综合懂
精品人妻少妇
岳乳丰满一区二区三区
亚洲熟女性视频
欧美大黑屄
亚洲色网导航
男人天堂一区
新视频SSS欧美整片
五月天堂
亚洲天堂2013
中国免费A片XXXXXX
国产18女人毛片真多水
亚洲激情偷拍
亚州成人视频
欧美A视频
小鸡入水蜜桃免费观看电视剧
精品无码产区一区二
狼友福利在线观看
jizz喷水
狼友福利在线观看
无码少妇人妻
爆乳一区二区
中文字幕欧美人妻精品一区蜜臀
91在线视频播放
jizzjizzyou
国产富婆一区二区三区
激情久久久
69avav?cn
免费AV网站
福利姬白浆AV导航
熟女国产精品网站
专区国产无码
3P性视频
熟女丝袜av
日本中文字幕色
亚洲国产精品成人网站
国产玖玖
日本无码中文
亚洲偷
中文字幕av久久爽一区
每日av
亚洲日韩AV无码专区影院
99黄色
口爆视频
小明福利社
亚洲二级片
日本精品视频
www.大熟女
熟女中文字幕丝袜日韩
久久18禁
精品1卡二卡三卡四卡老狼
亚洲欧美色欲天天
久久久久亚洲AV青青草原
精品国产91久久久久久亚瑟
超碰在线成人
欧美日韩精品一区二区三区钱
精品一二三
a免费在线
亚洲一区二区av
久久久久久久AV
日韩大香蕉
熟女丝袜无码
国产av一区二区三区
国产成人AV
麻豆国产
婷婷色小说
69精品人人人人人
一区二区水蜜桃
激情图区
专区国产无码
va精品在线
亚洲男人在线
99热国产在线
国产精品综合
国产中文在线
日本熟女Va视频
巨乳无码
亚洲最大三级网站
永久免费mv入口
91豆花成人社区在线
婷婷亚洲五月花视频
中文字幕亚洲精品
人妻无码一卡
av四虎
久久久黄色片
精品无码产区一区二
欧美另类高清videos的特点
午夜精品久久久久久久久久老司机
免费av网站
在线天堂中文字幕
口爆少妇
91人人草
91啪啪视频
一色道久久88加勒比一
国产成人无码AA精品一
口爆少妇
色婷婷基地
午夜激情网站
色哟哟精品
91在线视频播放
国产精品被狂躁到高潮
欧美a√
91在线视频
黑人成人网
www熟女com
又粗又大中文字幕
黑人一区
一区二区三区四区视频
极品虎白一线天馒头最新消息
巨乳无码
91精品久久久无码中文字幕少妇
中文字幕在线观看亚洲
亚洲小说区图片区
亚洲网在线
熟女一区二区三区
三级片导航
无码中文幕
天堂VA蜜桃一区二区三区
亚洲性爱片
亚洲又粗又大
亚洲熟妇色自偷自拍另类
男人天堂2025
人妖福利导航
小明福利社
蜜桃秘?av一区二区三区安全
亚洲图片综合
亚洲色情在线播放
亚洲成人性爱网站
中文字幕一区二区无码成人
亚洲熟女豪乳视频
欧美顶级metart祼体全部自慰
中文字幕在线无遮挡
3p露脸在线播放
66精品人妻
成人小说一区二区三区
999无码精品亚洲精品日韩人妻无码
国产制服丝袜在线观看
69精品人人人
3P无码
国产va在线
99中文在线精品
jizzjizz国产
免费AV在线
极品在线视频
色天使AV
久久久久亚洲AV青青草原
91视频免费观看
www.成人
av黄色
宫西光在线
67194欧洲
跪求黄色网址
中文a片
制服丝袜亚洲在线
高跟熟女中文字幕在线亚洲
熟女老骚91PORN九色
久久无码专区
XXXX欧美
超碰w
中文字幕高清在线观看
午夜成人三级
亚洲综合无码
亚洲无码在线播放
久久国产影院
国产熟女网站
熟女在线视频
九色91
国内黄色视频
少妇50p
欧美老妇熟妇???亚洲日韩
国产老熟女伦老熟妇露脸
国产v在线
中文字幕丝袜
五月花激情网
精品av
综合Av
国产精品99久久久久久噜噜
亚洲中文字幕在线看
亚州性色
丝袜精品字幕
乱色
综合色道
内射在线播放
亚洲欧美制服
洋洋AV
欧洲一区二区三区
欧美freesex精品
国产精品久久久影院色
AV在线无码
亚洲欧美视频
成人国产综合
婷婷五月激情综合
精品久久久久中文慕人妻
91综合网
国产麻豆天美果冻无码视频
不卡的av在线
AV青青草
国产熟女在线播放
黄www
freeAV爽视频
精品va在线观看
91免费在线
无码中文幕
jizzy
亚洲最大成人综合网
专区国产无码
深爱色情网
国产一区二区三区18
久久AV秘?一区二区三区水生
国精产品一区一区二区三区mba
亚洲综合图
91超碰在线观看
国产无码VA
www.熟女
天堂在线中文字幕
亚洲激情av
欧美老妇熟妇???亚洲日韩
亚洲男人天堂网
日韩欧美亚洲
国产丨熟女丨国产熟女??在线
超碰123
自拍偷拍视频网站
中文字幕乱码亚洲中文在线
黑人变态另类videos
老司机免费视频
夊夊夊夂夂夂夂夂夂夂亚洲亚洲亚洲亚洲色色色
在线视频免费看3
精品合集播放
人人操网
jizz国产
国产V在线
中国女人做爰A片
99久久婷婷国产综合精品青草五月
精品国产乱子伦一区二区三区,精品一
亚洲中文字幕系列
99视频精品
av无码免费在线观看
精品黑人一区二区三区国语馆
亚洲熟妇色自偷自拍另类
人妻少妇一区二区三区
国产va在线播放
亚洲色图导航
中文字幕一二三区
日韩欧美午夜成人无码
男人天堂国产
jizzjizzyou
一区二区av
超级碰在线视频
www.jizzjizzjizz
超浪熟女在线
蜜臀久久99精品久久久酒店新书
欧美3p视频在线观看
三成人免费看
久久被窝
国产精品V在线播放
亚洲色图另类
欧美在线a
综合AV
俺去啦中文网
久久精品6
亚洲天堂视频在线观看
亚洲丝袜精品在线视频
亚洲中文在线观看
浮力影院麻豆
蜜桃AV在线
91视频播放
97人妻精品一区二区三区软件
成人国产综合
日本亚洲国产
性视频网址
AV在线亚洲天堂
√国产精品
精品va在线观看
a免费在线
久久18禁
3P性视频
www.亚洲V
免费jizz
18久久
熟女中文字幕在线
乐活家庭迅雷
91视频在线看
亚洲无码2
日韩一区二区三区三四区视频在线观看
欧美福利导航
欧美精品在线观看
超碰人人人
欧美福利极品
多人乱p视频在线免费观看
影音先锋91
76少妇精品导航久久久久
男人亚洲天堂
日本va欧美ⅴa欧美Va精品
天堂中文字幕
亚洲天堂视频在线观看
天海翼无码在线
密臀av
国产黑丝袜在线观看视频
少妇50p
你懂的国产在线
国产AV一区二区三区
制服丝袜无码视频
人人肏
超碰w
亚洲在线一区二区
成人av中文字幕在线播放
一区777
欧美亚韩一区二区三区
男人天堂2025
中文亚洲字幕
中文字幕在线天堂
国产一本二本三本在线观看
亚洲日韩?国产丝袜?在线精品
91丨九色丨熟女|新版
少妇人妻AV
久热av性爱在线观看
中文字幕自拍
亚州无码熟女
亚洲熟女无码在线
日日网
久久18禁
日本大色情www成人亚洲
制服丝袜无码视频
中文字幕av久久爽Av
制服丝袜无码视频
国产成人亚洲日韩欧美婷婷亚片
成人亚洲
国产精品久久久
亚洲色a
女人天堂AV
久久国产影院
中文久久久无码
中文字幕高清在线
亚洲色图另类
久久久性爱
jizzjizz
国产精品无码永久免费A片
3P在线
国产人妻人伦精品一区
操碰网
欧美不在线
国内视频自拍
av在线播放制服
亚洲国产VA
metart亚洲裸体中国
人人人操
精品一二三
又长又大又黑又粗欧美
熟女精品
制服丝袜在线亚洲
中文字字幕在线中文乱码
青青草Av
成人硅胶娃做爰无码www
亚洲AVAV天堂Av在线播放
欧美涩色
亚洲精品之国产av
第一福利成人AV导航
中文字幕日产av
无码人妻AV一区二区
亚洲人妻系列
人人人操
3P无码
亚洲欧美制服
国产老熟女伦老熟妇露脸
风流老熟女一区二区三区
丝袜精品字幕
天堂一区在线观看
亚洲熟女视讯2
久久av高潮av
无码AV在线播放
欧美人妻少妇
国产一二三
制服.丝袜.亚洲.中文.综合
亚洲avav
中文区av无码中文字幕dⅴd
黑人又大又粗免费视频
蜜桃视频在线播放
亚洲黄色成人网站
jizz麻豆
998av资源影音先锋
国产精品高潮呻吟久久AV嫩
9l精品国产一区二区
亚洲色老头
99精品视频在线
中文字幕在线网址
18禁久久久久久久
99在线免费观看
熟女网址
91网站免费
亚洲日韩AV无码专区影院
日韩精品人妻中文字幕有
中文国产
四季AV一区二区夜夜嗨
九九精品在线观看
成人无码小说
人妻少妇嫩草AV无码
操碰网
中国老熟妇
www.com黄色
亚洲熟女精品中文字幕m
蜜臂av
超碰97人妻
97人妻在线
欧美《熟妇做爰》HD
大香蕉一区二区三区
午夜成人福利
小鸡入水蜜桃免费观看电视剧
国产色资源
超碰人妻在线
人妻?制服?丝袜
亚洲中文字幕高清
爆乳一区二区
亚洲中文字
国产av大全
69精品人人人人人
久久精品99久久久久久久久
91婷婷
亚洲精品影院
午夜剧场黄色
亚洲成人中文字幕
97人妻免费公开视频
绯色AV毛片一级
久久久性爱
四虎成人精品在永久免费
黄色国产视频
影音先锋成人网站
中文字幕一区二区三区四区50岁
www.熟女
超碰成人免费
中文区av无码中文字幕dⅴd
91国内视频
欧美丰满少妇人妻精品
欧美涩色
jizzjizz在线观看
日本高清免费AAAAA大片视频
亚洲无码在线播放
亚洲成人综合网站
精品A片
国产传媒_色哟哟
日韩色导航
浮力影院麻豆
一区二区AV
熟女视频在线观看
四虎成人精品在永久免费
人妻无码中出
一本一道久久综合狠狠躁牛牛影视
亚洲在线一区二区
超碰碰97
亚洲无码流出
久久影音先锋
亚洲偷
亚州性色
亚洲最大三级网站
国产V视频
日韩电影精品
91牛
中文字幕熟妇人
jiZZjiZZ欧美69
3p视频在线
jizz18
亚洲丝袜熟女
亚洲男人在线
中文字幕在线观看亚洲
熟女Www亚洲国产W
欧美老妇熟妇???亚洲日韩
99精品丰满人妻无码一区二区
九九在线精品
亚洲色偷偷
天堂无码
亚洲制服丝袜在线
人妻无码专区
蜜臂aV
91熟女视频
精品人妻潮喷久久久又裸又黄
亚洲欧美综合
综合一区二区三区
一本大道久久久久精
亚洲无码色
国产主播第一页
人人肏
色涩涩网
成人小说一区二区三区
中文字幕制服丝袜
久久久久无码
亚洲精品国产第一页第二页_久久精品国产亚洲a片无码_国产精品乱码一区二区三
91在线观看视频
久久久黄色片
jizz日
亚洲天堂高清
欧美福利导航
日韩色美女
国内视频自拍
国精产品一区一区二区三区mba
多毛老熟女
伊人69
久久99视频
精品熟女
韩国无码一区二区三区精品
一本一道狠狠躁东京热
麻豆乱码国产一区二区三区
麻豆精品久久久久久久99蜜桃
av高清
一本大道久久久久精
亚洲日韩在线中文字幕
91乱子伦国产乱子伦
国产v片
亚洲中文自拍
久久久999
3P在线观看视频
国产免费va
2020久久超碰欧美
欧美freesex潮喷
国产盗摄人妻精品一区
无码AV在线播放
亚洲欧美另类在线
国产熟女精品
亚洲精品熟女
国产av一区二区三区
69天堂
欧美成人精品
91露脸
欧美18在线观看
男人天堂网址
欧美午夜福利
91资源站
国产乱妇无码毛片A片在线看下载
久久久久厕拍
夜夜欢视频
日韩一级视频
中文区av无码中文字幕dⅴd
中文久久久无码
www.亚洲V
爱色影网
最新中文字幕在线
丰满少妇被猛烈进入无码
亚洲天堂中文字幕
jizzav
手机看片1024人妻
熟女中文字幕
亚洲色无码
成人三级久久久久视频
亚洲中文字幕播放
亚洲无码人妻
富婆熟妇熟女二区三区
亚洲国产精品羞羞
91牛牛
亚洲熟女精品
丁香六月婷婷综合激情欧美
99在线精品国自产拍不卡
丁香五月激情图片
中文字幕在线v
欧美777
中文字幕无码传媒
亚洲男人在线
精品久久久久中文字幕无码油
超碰97人妻
3p在线
内射在线播放
风流老熟女一区二区三区
亚洲在线一区二区
国产熟女在线播放
国产熟女在线播放第一页
国产制服丝袜在线观看
亚洲无码久久
亚洲熟女精品
中文字幕在线观看亚洲
亚洲综合图
影音先锋资源
欧美牲交视频
尹人97
wwwwww.日本色
超碰成人电影
亚洲天堂在线播放
中文无码日
国产熟女口爆
日韩AV一区二区三区
综合色道
福利二区
69avav?cn
成人福利网站导航秘?涩涩屋
jizzjizz国产
色天使AV
av狼友
网友自拍偷拍一区
淫色人妻网
人妻少妇精品
日韩色美女
波多野结衣av88综合
人妻制服丝袜中文字幕
久草福利资源站
亚洲123
亚洲中文字幕系列
尤物av在线
国产精品国产三级国产专区53
熟女中文网站
国产一本二本三本在线观看
久久久久亚洲AV青青草原
www香蕉成人片com
人人人操
3pAV在线播放
国内精品99偷拍
激情图区
色二区
尹人97
精品国产av
中文字幕人妻系列
国产成人精品无码免费看动漫
老熟女网站
蜜臀久久99精品久久久久久牛牛
绯色AV毛片一级
久久久久99精品成人片毛片
欧美日韩xxx
精品国产99久久久久久www
女生洗鸡鸡喷尿的视频无马赛克?舒坦直叫的骚货视频?亚洲着九九九视频影院
无码精品黑人
亚洲无码免费在线观看
中文字幕在线v
熟女国产精品
A片网
日韩精品人妻中文字幕有
熟妇久久无码人妻av蜜臀www
中文字字幕在线中文乱码
青青草欧美
日韩3p在线
99麻豆
囯产精品99久久久久久WWW
尹人97
日韩激烈无码
国产成人AV
草肥熟老熟妇600部
黑人一区
美女黄色网
日韩无码毛片
精品人妻少妇
第一宅男AV导航
亚洲91页
性视频网址
自拍亚洲欧美
日韩3p在线
色二区
人人人操
中文字幕精品熟女
一本二本无码
中文久久久无码
国产精品制度丝袜电影
老熟女网站
老女人丨91丨九色
蜜臂av
3p视频在线观看
亚洲中文字幕无线
99xa视频在线观看
亚洲日韩AV无码专区影院
色婷婷影院
人妻少妇
国产成人91
自拍偷拍视频网站
久久久人妻
美女一区二区三区
自拍偷拍视频网站
久久99精品久久久久
91视频精品
一色道久久88加勒比一
影音先锋资源在线
****亚洲成a人片第1集
 80mm Receipt Printer
 ACE H2 Receipt Printer
 RP337 Receipt Printer
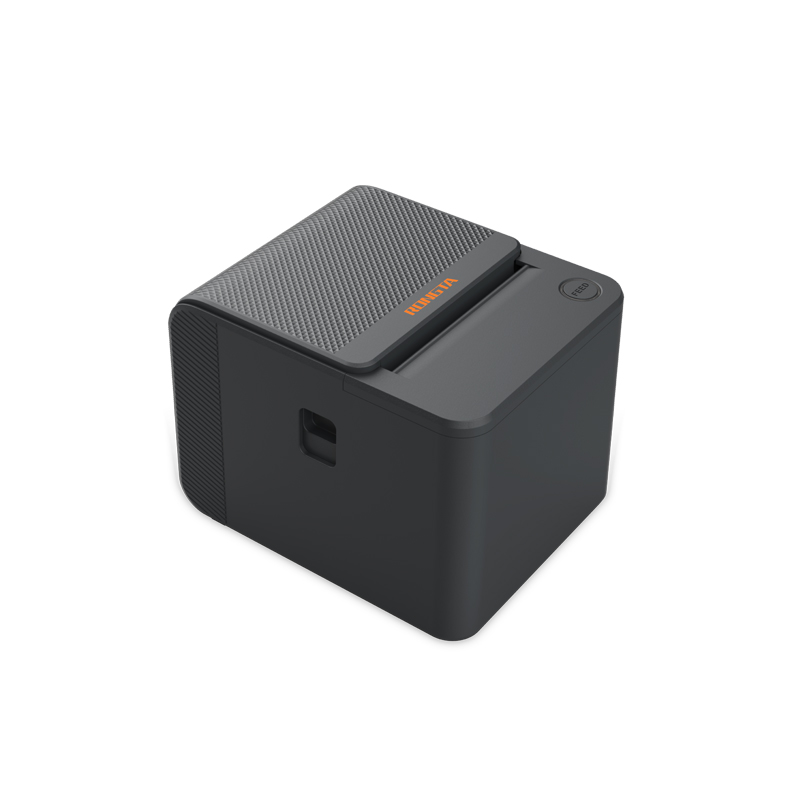 RP336S Dual-Color Receipt Printer
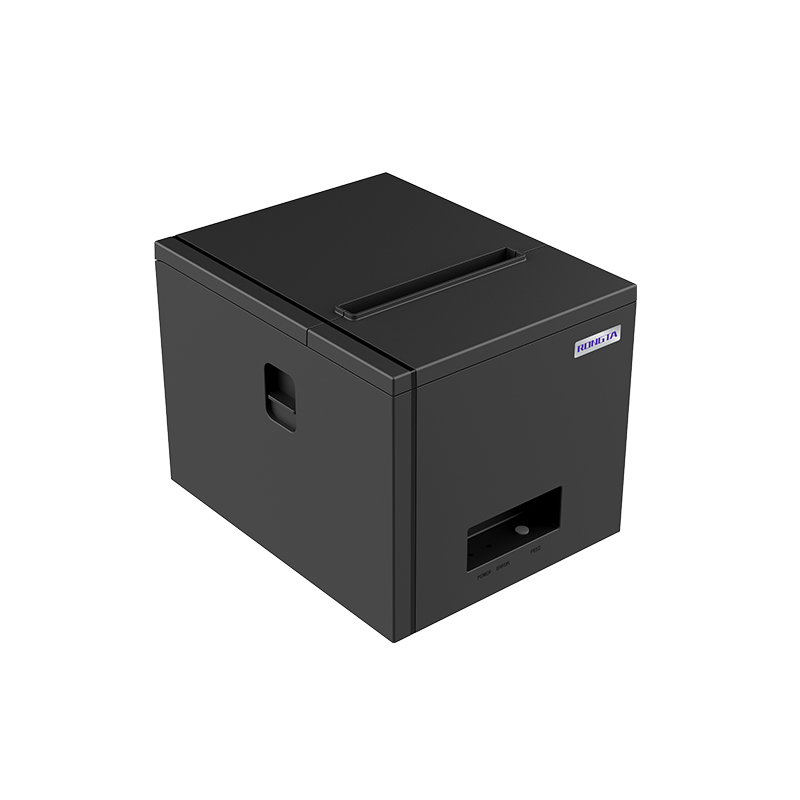 RP350 Receipt Printer
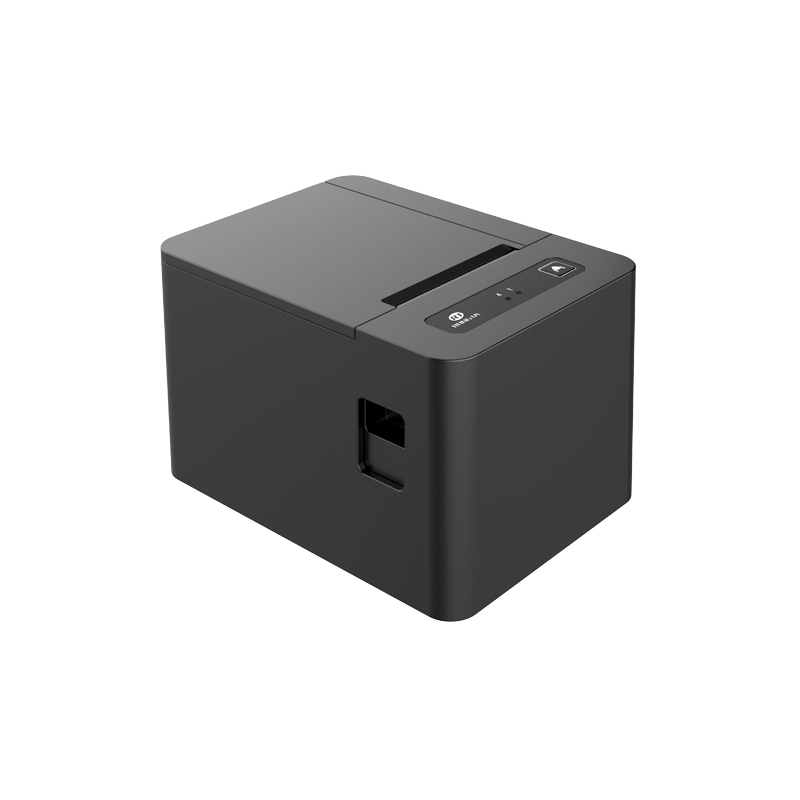 RP582 Receipt Printer
 RP581 Receipt Printer
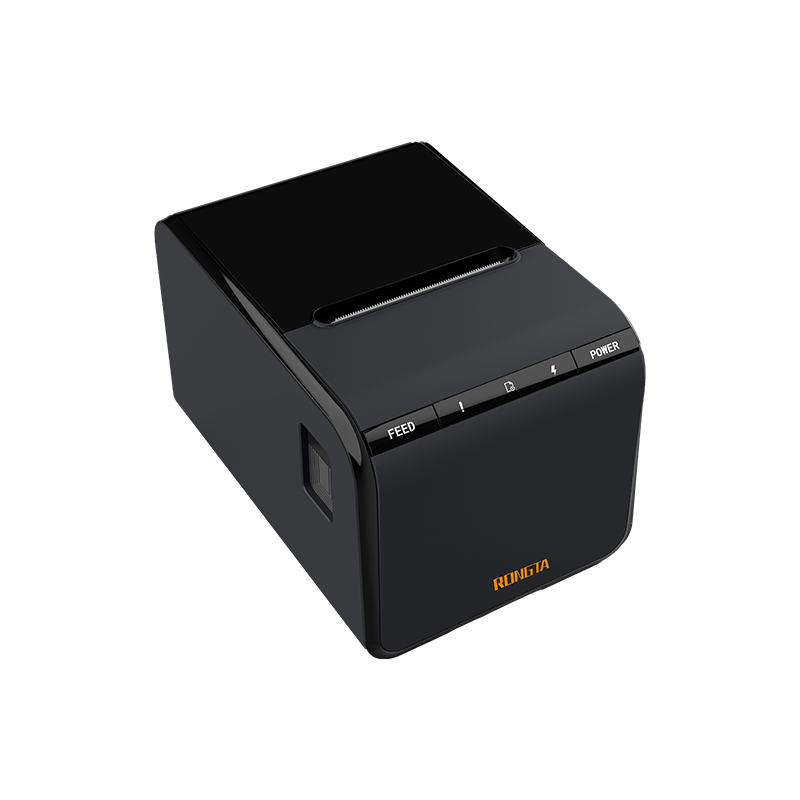 ACE G1Y Receipt Printer
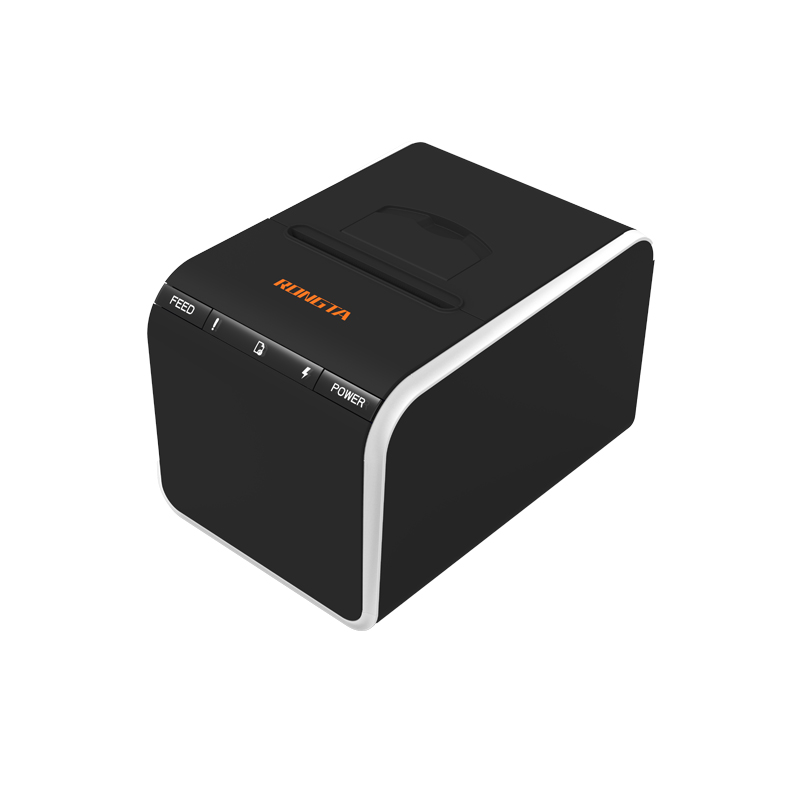 ACE G1YP Cloud Printer
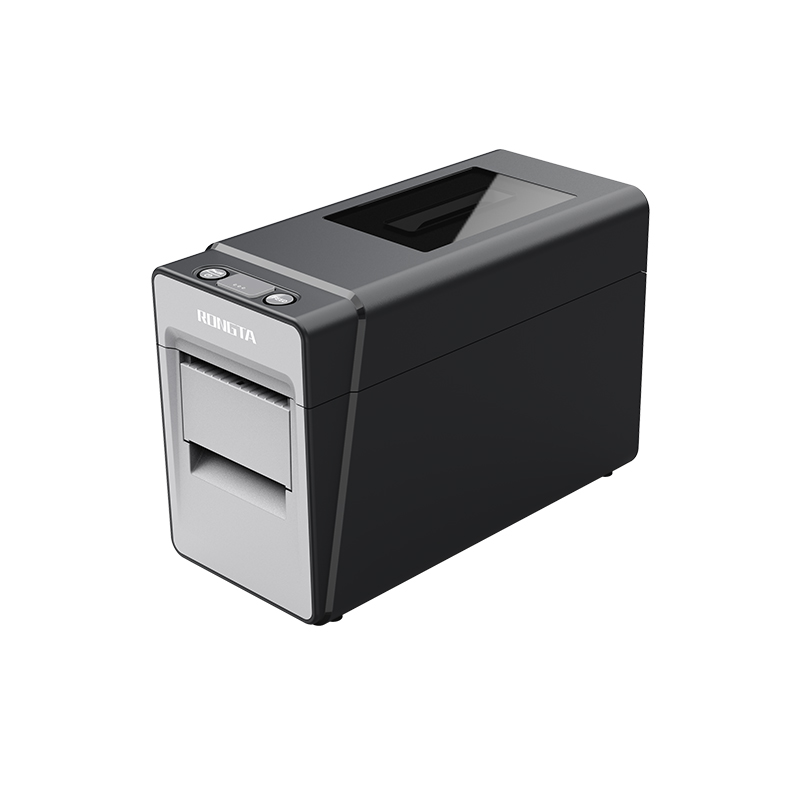 RP216 2'' Dual-color High-definition Label Printer
 ACE V1S 3'' Backless Label Printer
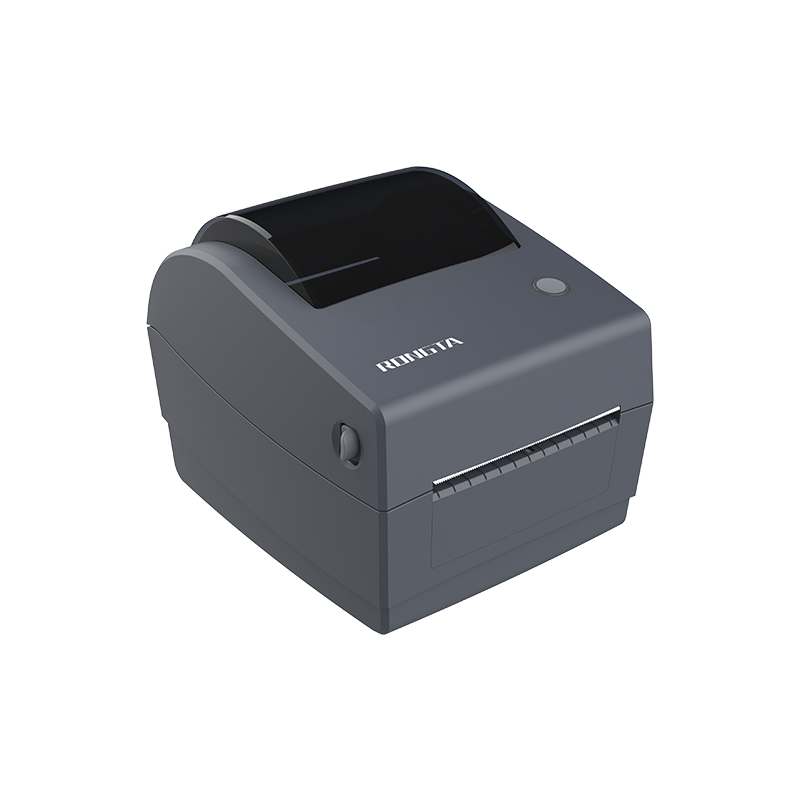 RP310D 3'' Dual-color Label Printer
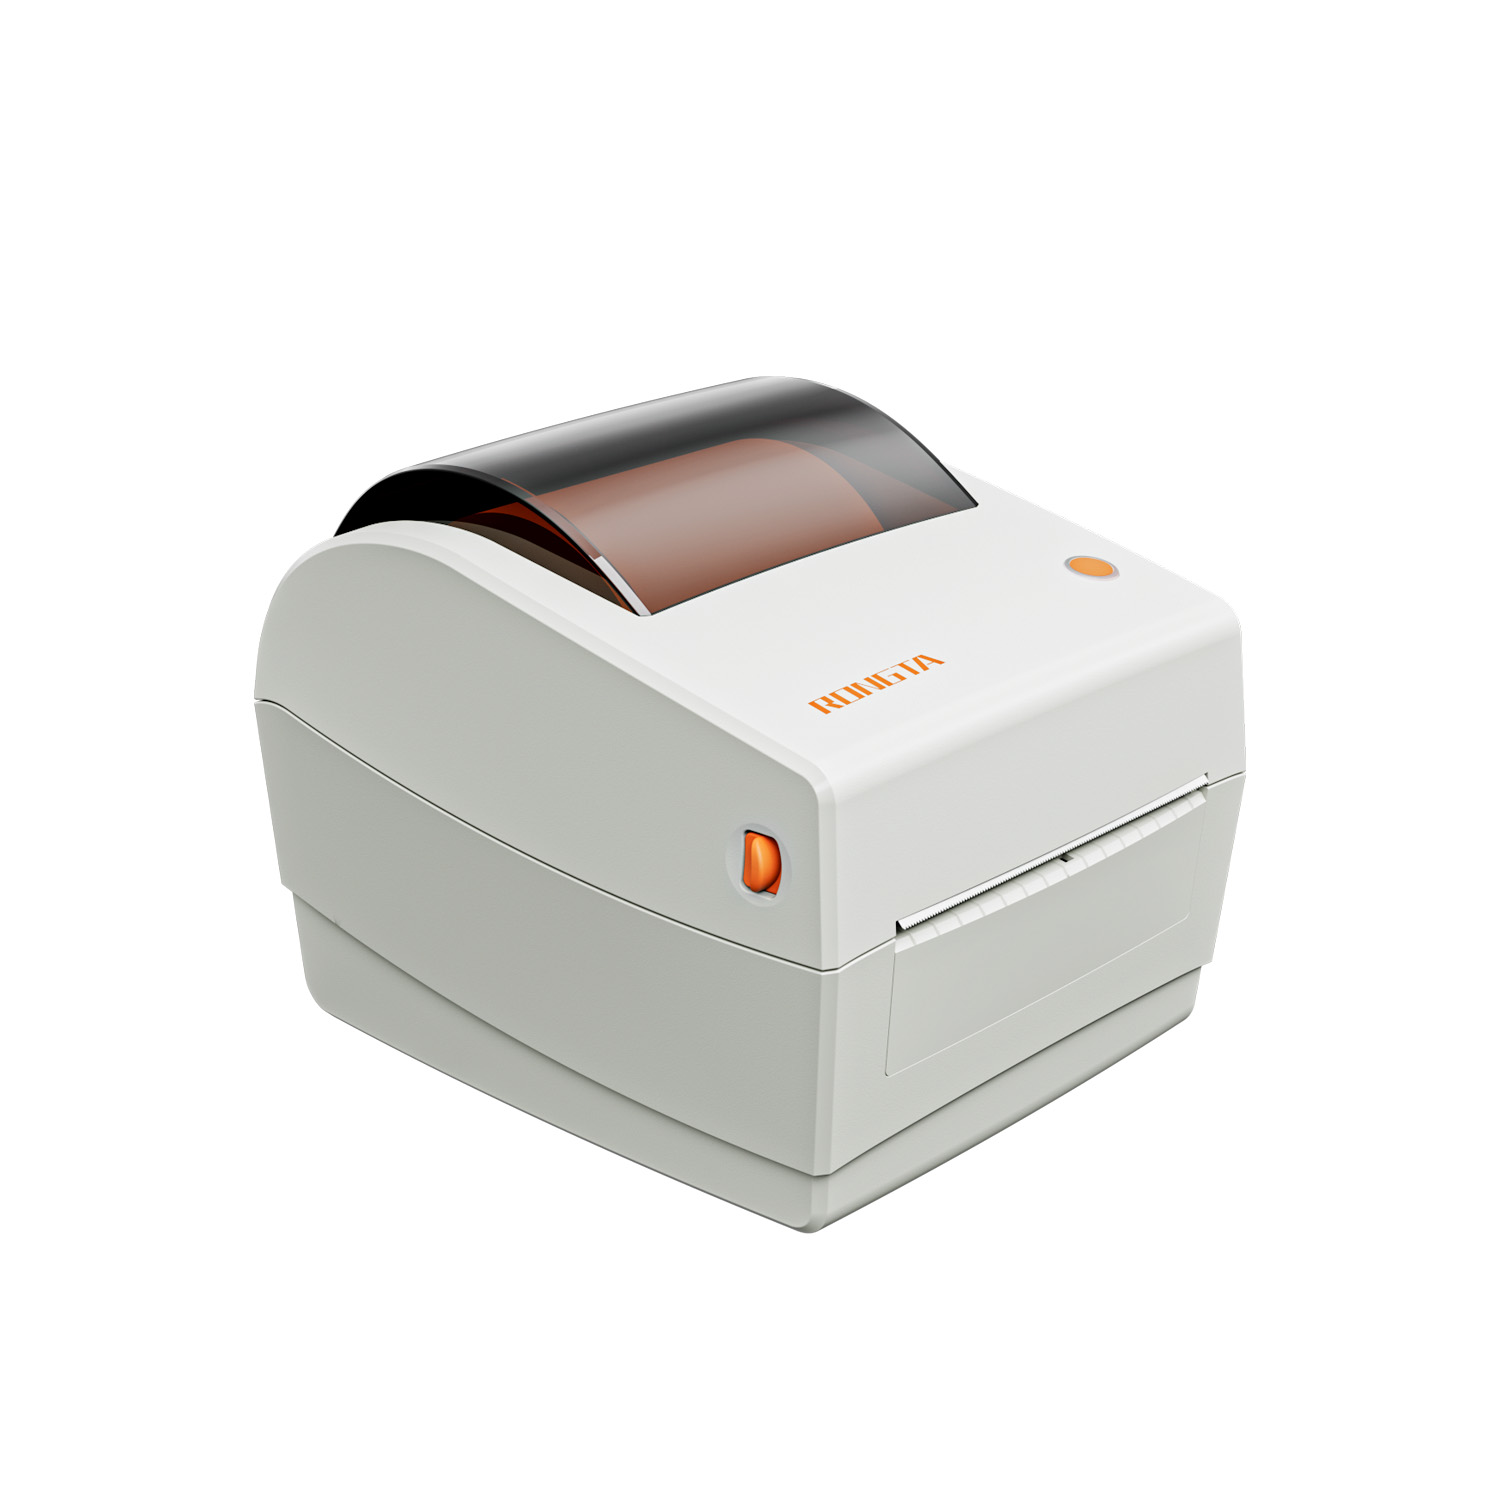 RP410N 4'' Thermal Label Printer
 RP425 4'' Electronic Waybill Printer
 RP422 4'' Electronic Waybill Printer
 RP421A 4'' Electronic Waybill Printer
 RP420 4'' Electronic Waybill Printer
 RI463 Series Barcode Printers
 RP400A 4'' Thermal Transfer Tape Cutter Printer
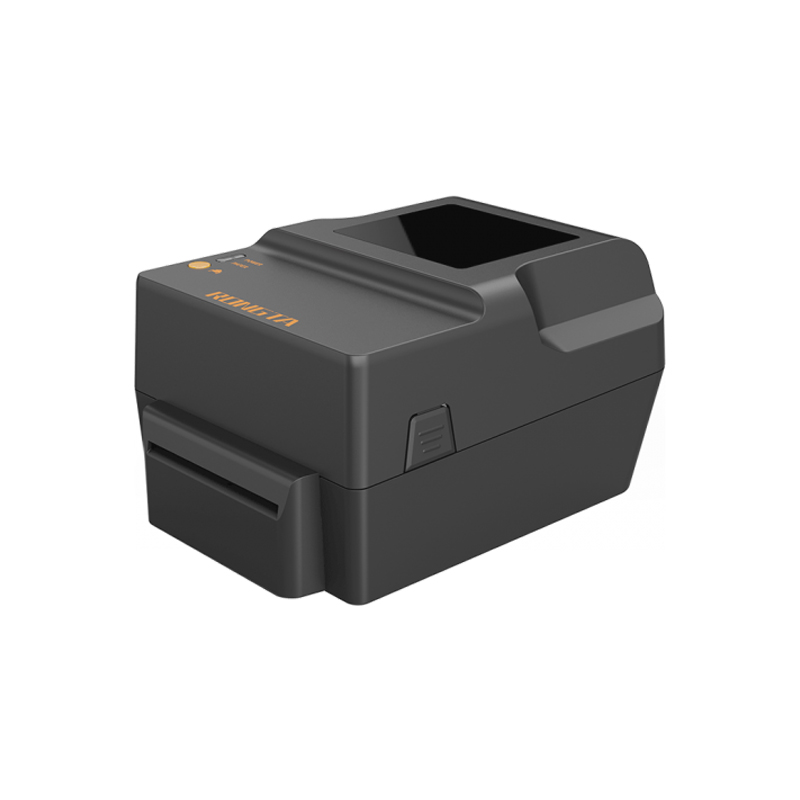 RP400H 4'' Thermal Transfer Tape Cutter Printer
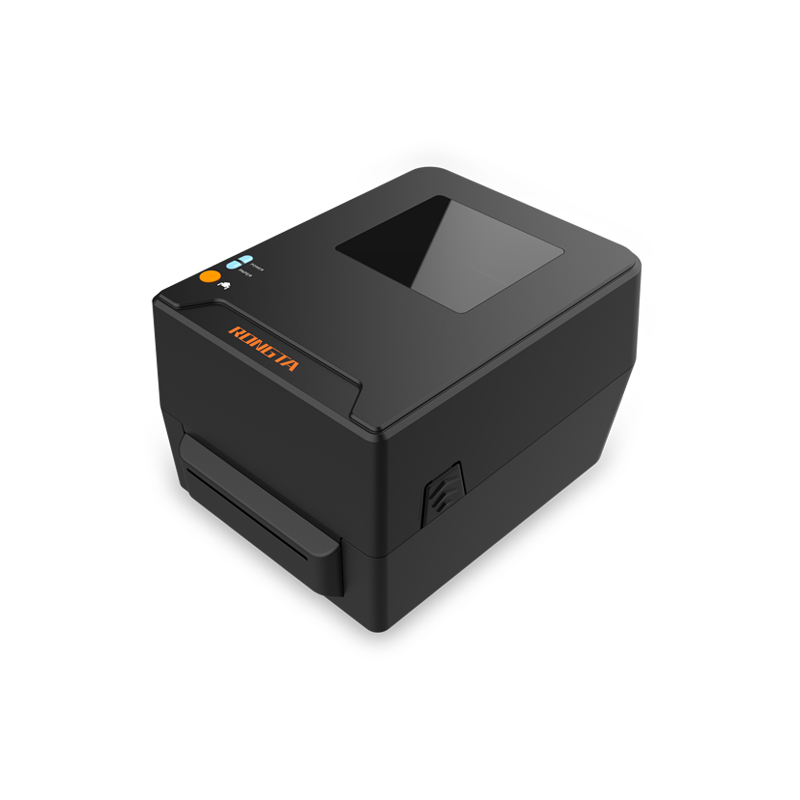 RPF413 300dpi RFID barcode label printer
 RPP02A Portable Receipt Printer
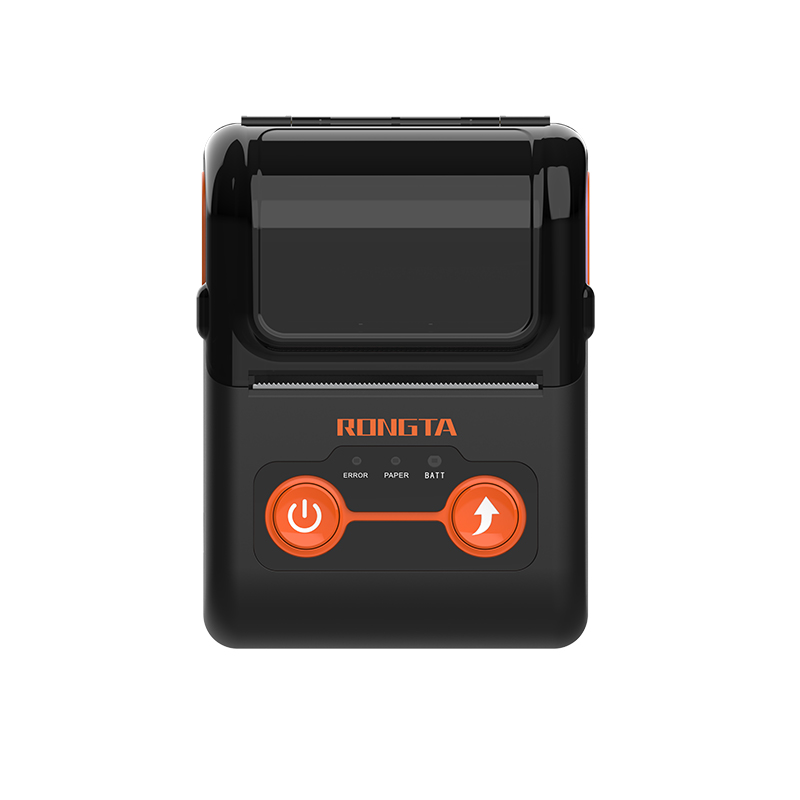 RPP02B Thermal Portable Printer
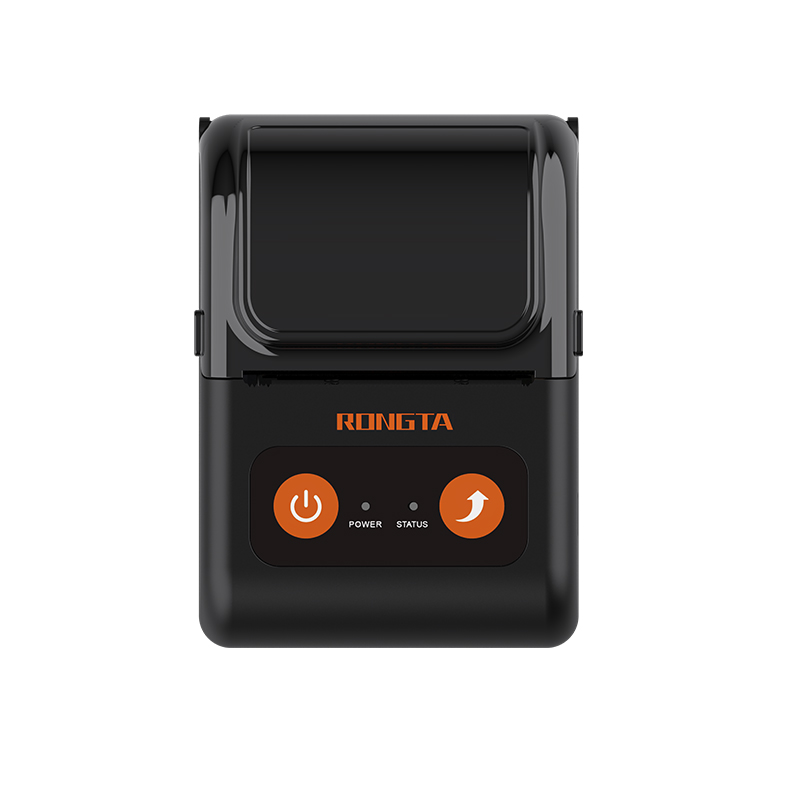 RPP02C Portable Receipt Printer
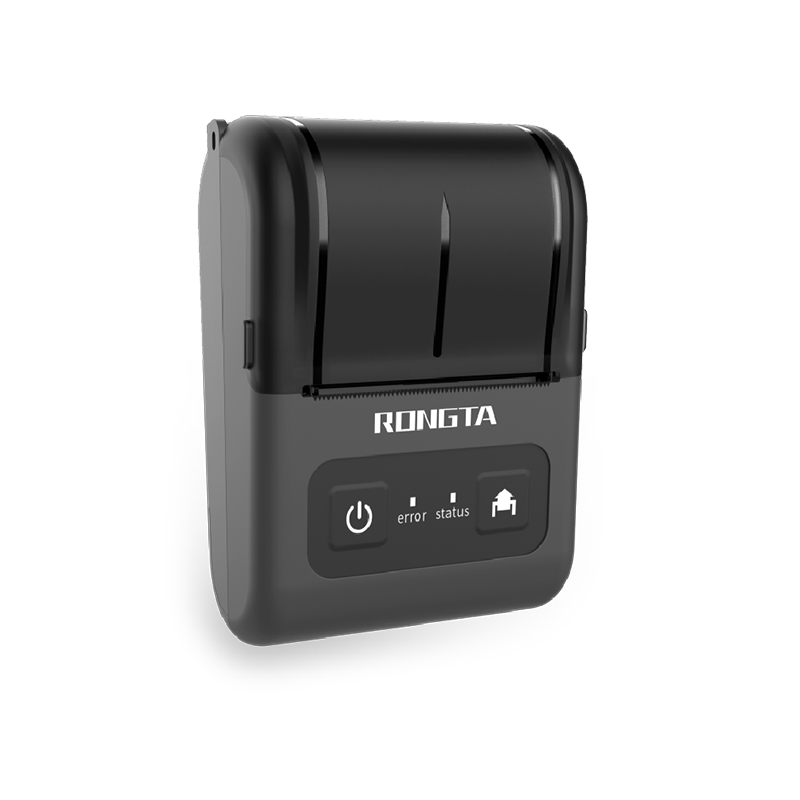 RPP02D Thermal Portable Printer
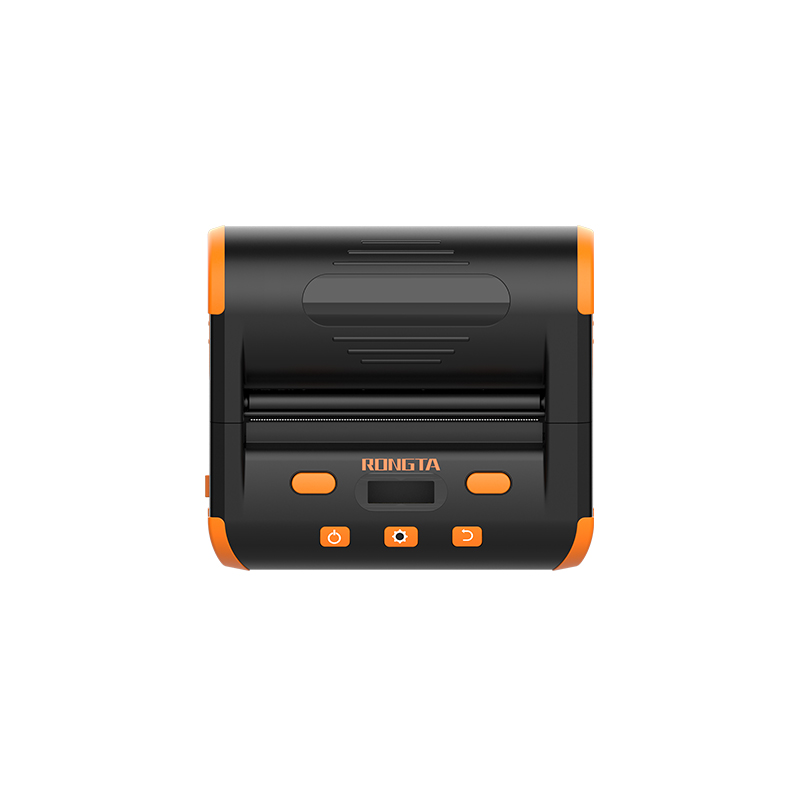 RPP04 4" Portable Label Printer
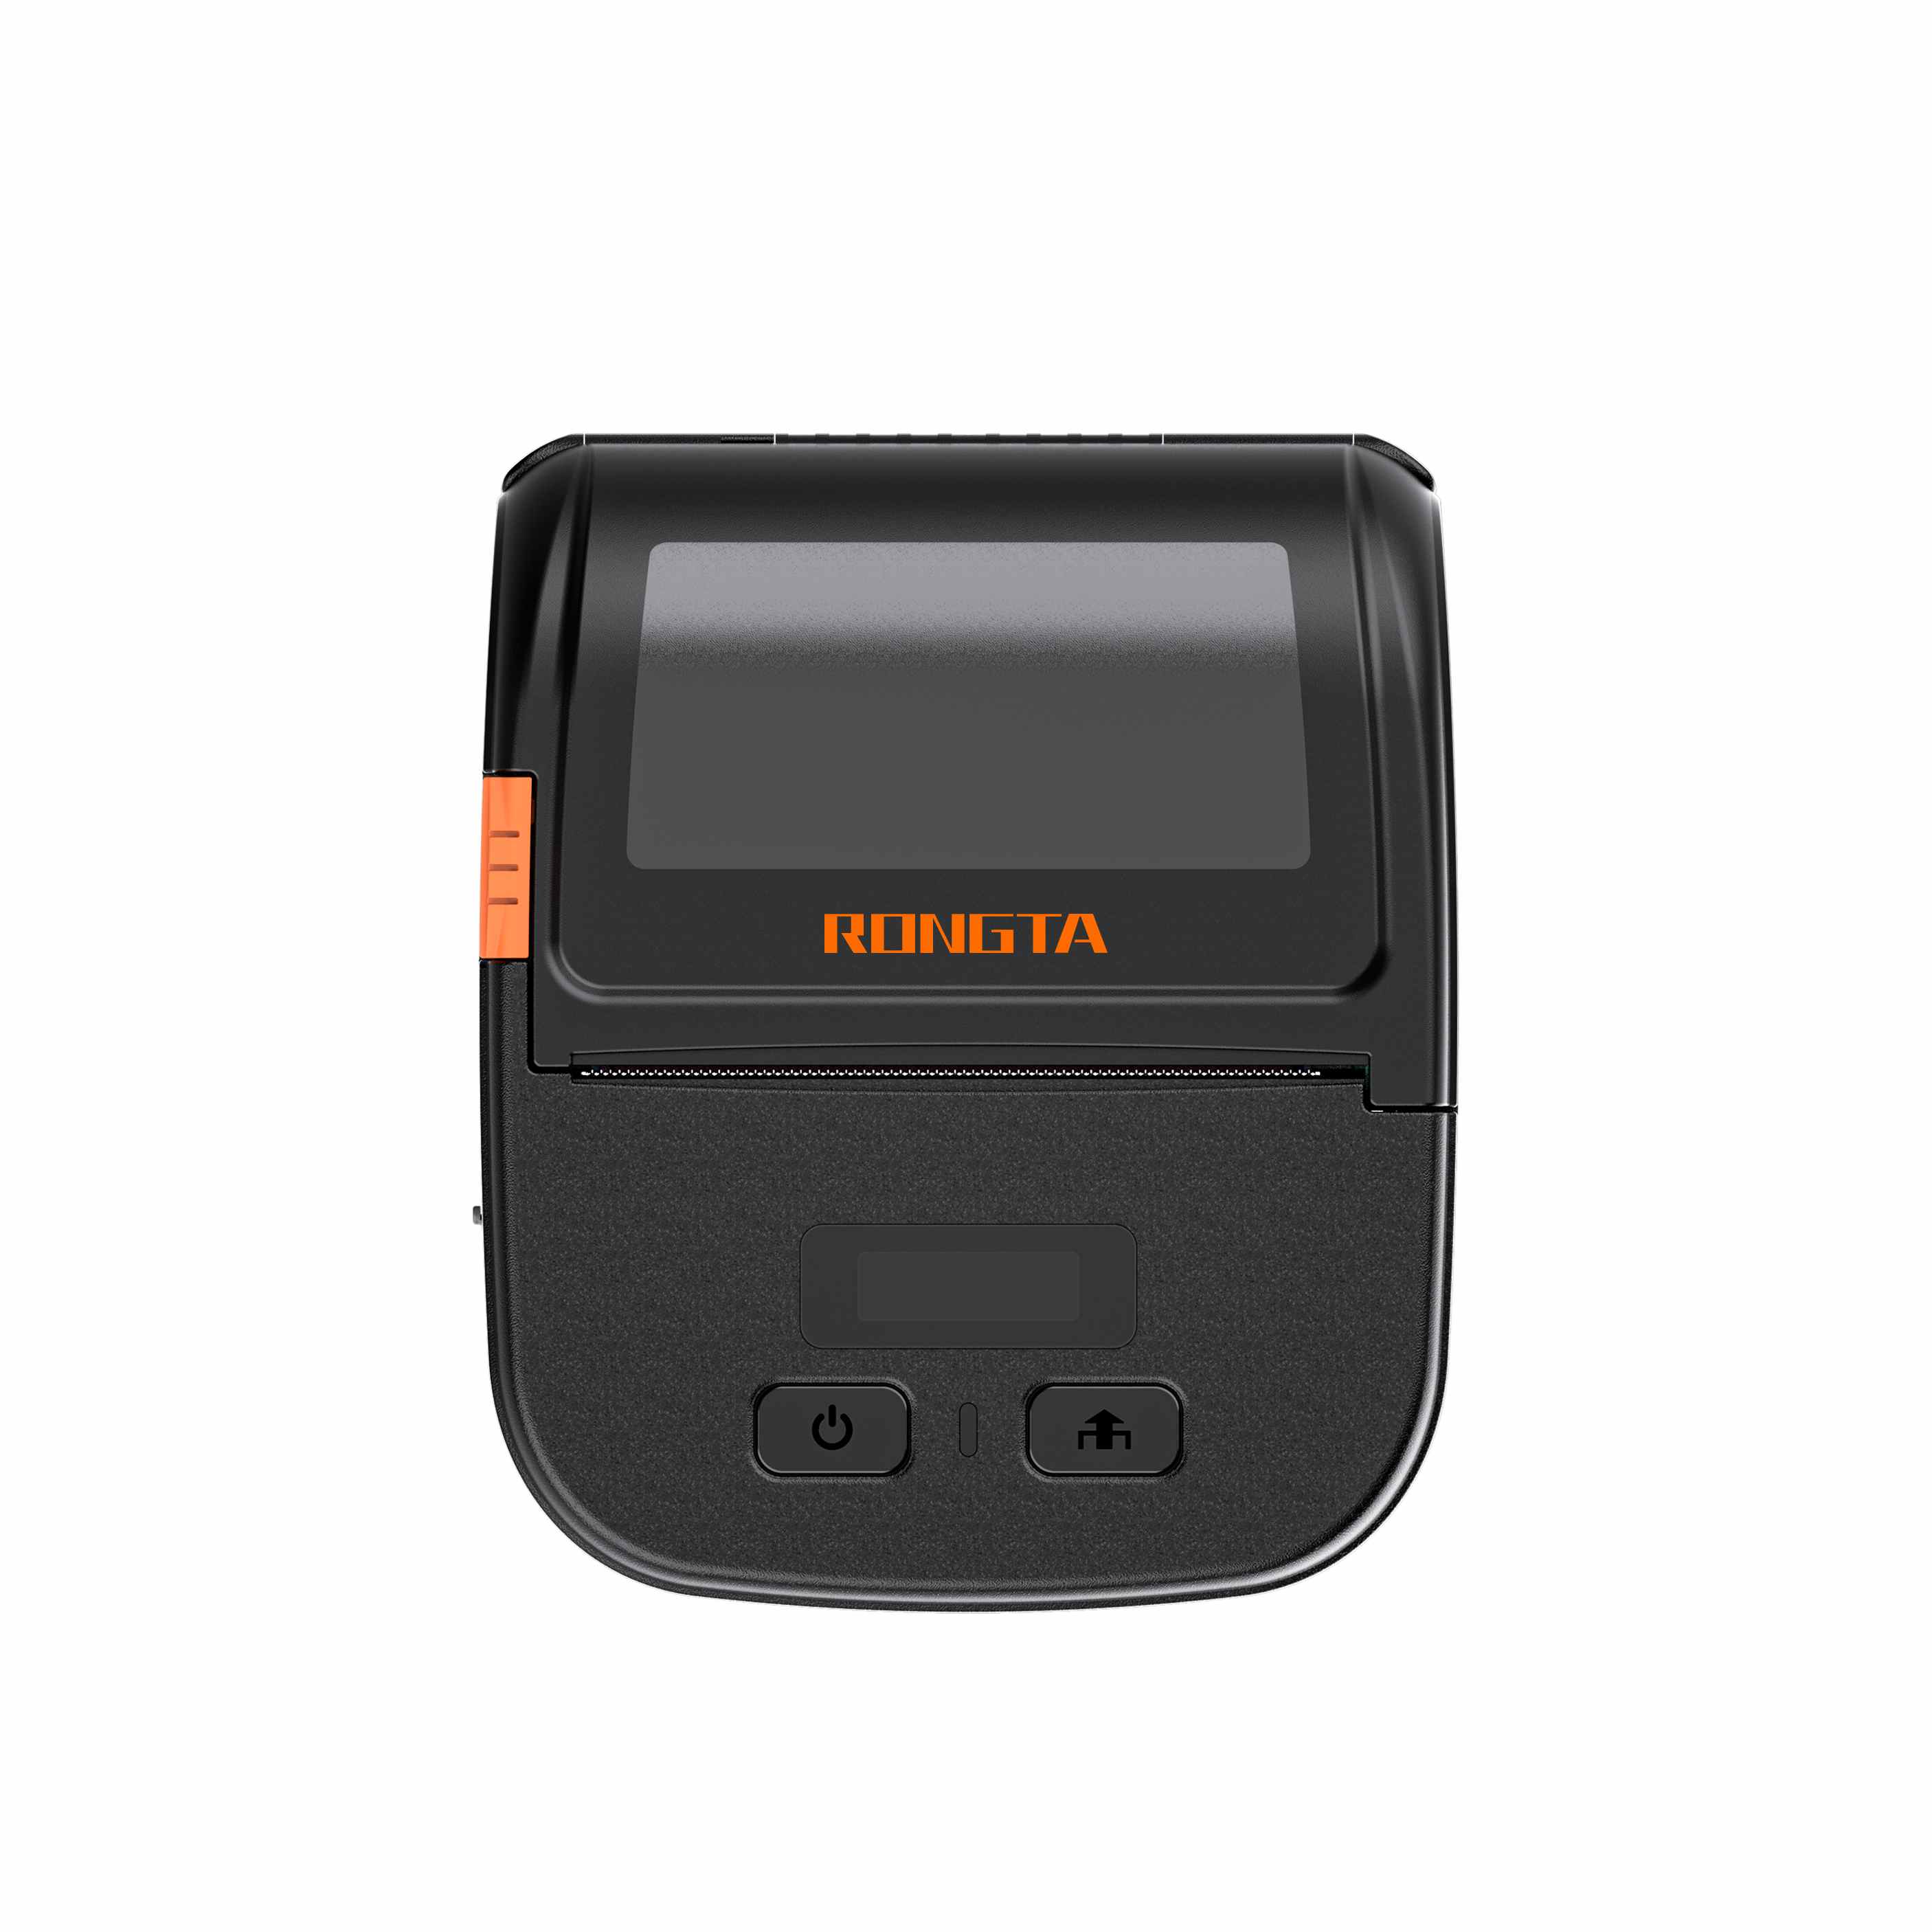 RPP30 3" Portable Label Printer
 ACE M1 2" Portable Label Printer
 RPP320N 3" Portable Label Printer
 F82A A4 Front-Out Paper Tray Thermal Printer
 F81A Portable A4 Thermal Printer
 F81S Portable A4 Tattoo Printer
 Z1 Children's Educational Photo Printer
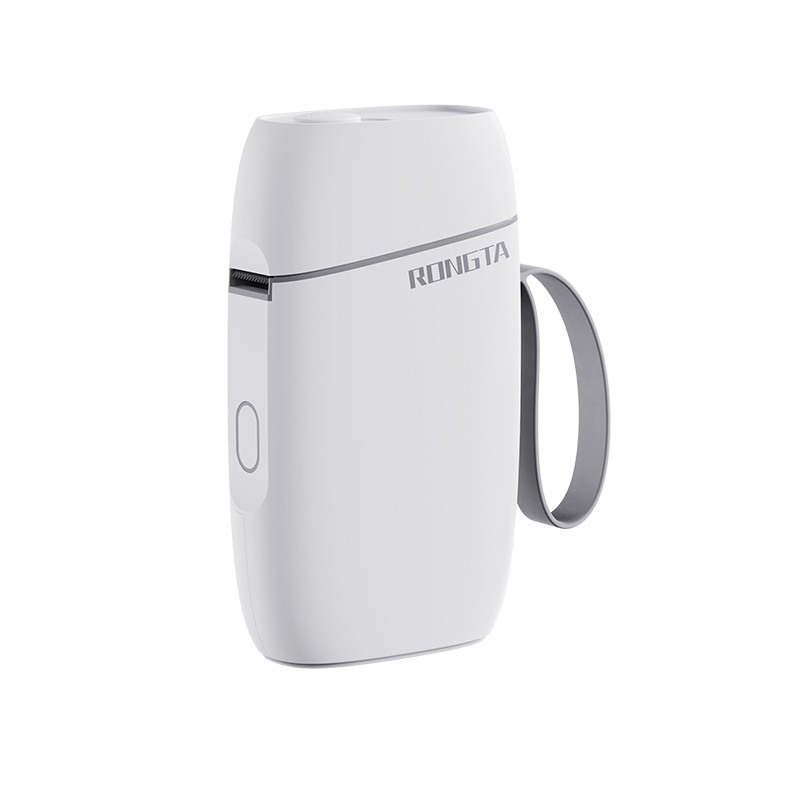 R5 Mini Label Printer
 RP07 58mm Embedded Printer
 RP203 58mm Embedded Printer
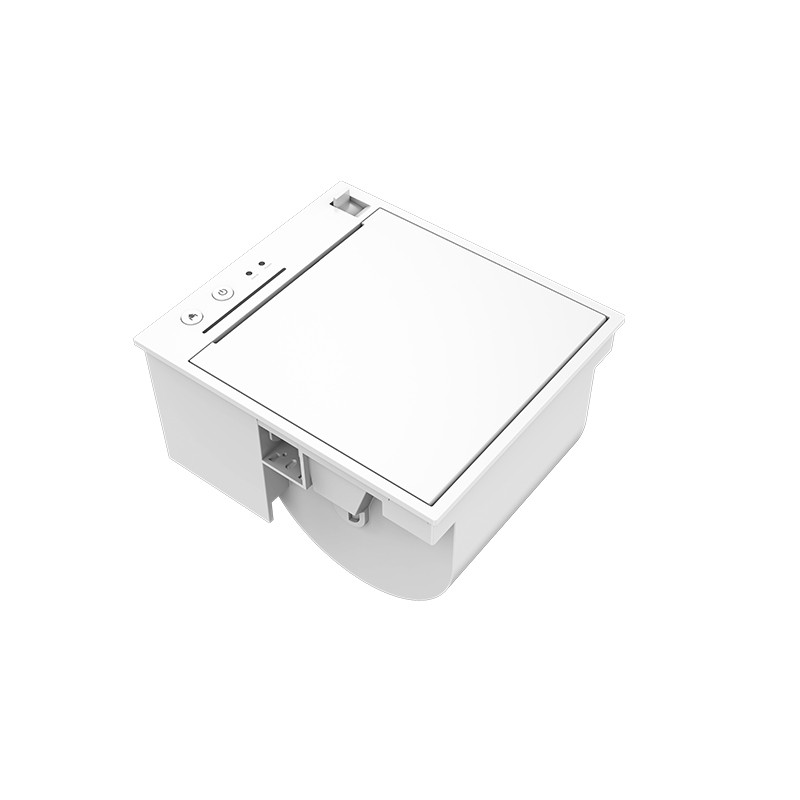 PM315 Embedded Thermal Printer
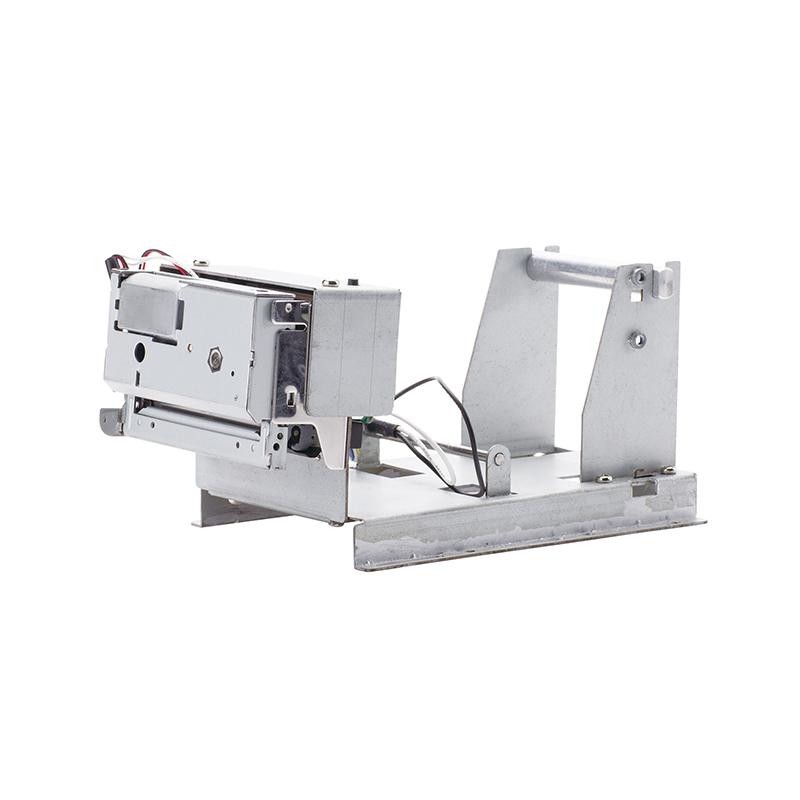 PM201 48mm Printing Module
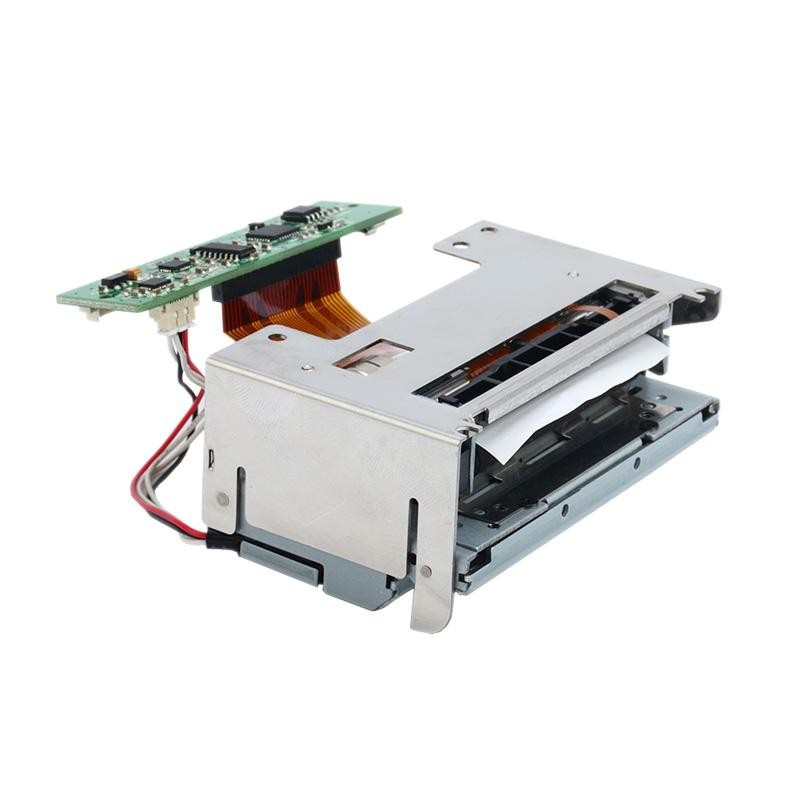 PM628 58mm printing module
 PM532A Printing Module
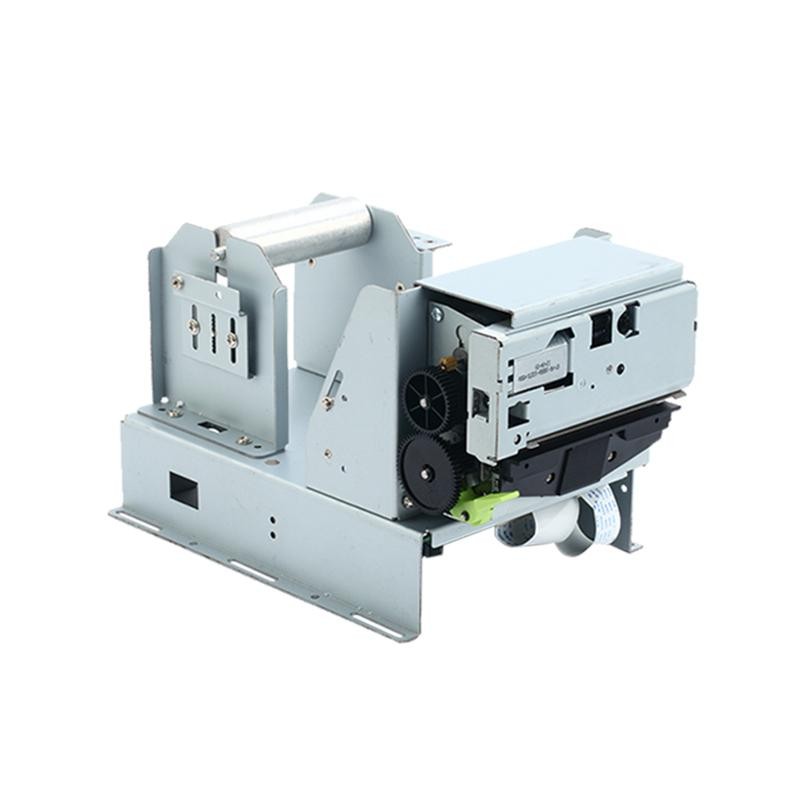 PM532B printer module
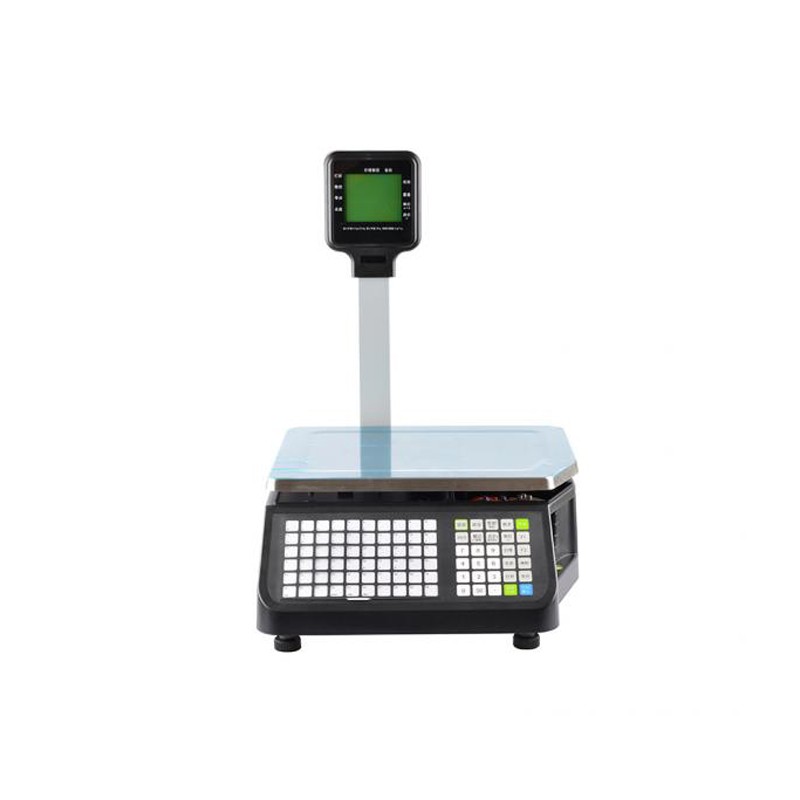 LS015/LS015A Barcode Scale
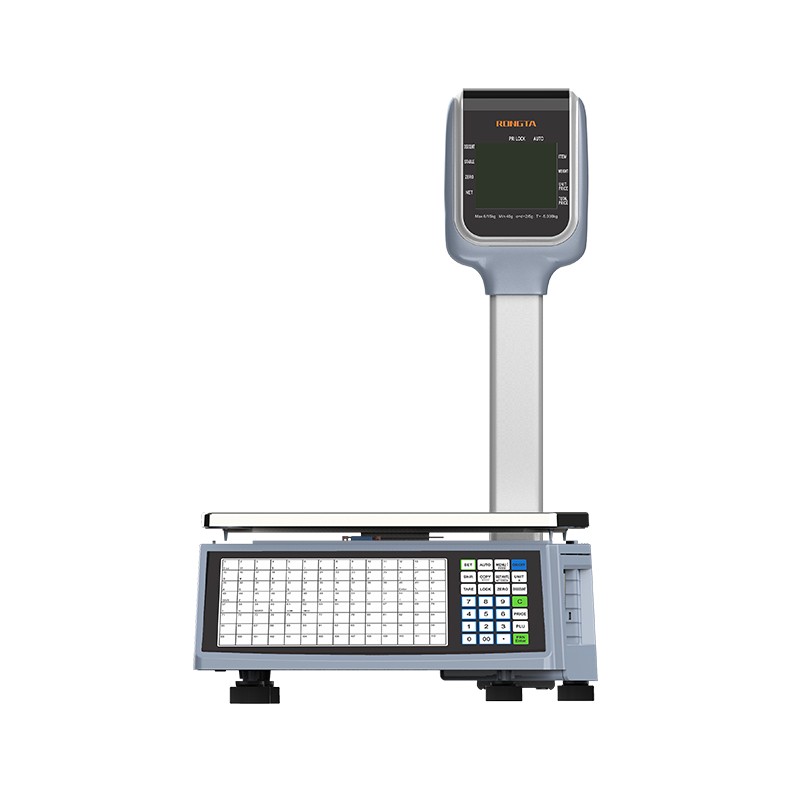 RLS1815D/RLS1830D Barcode Scale
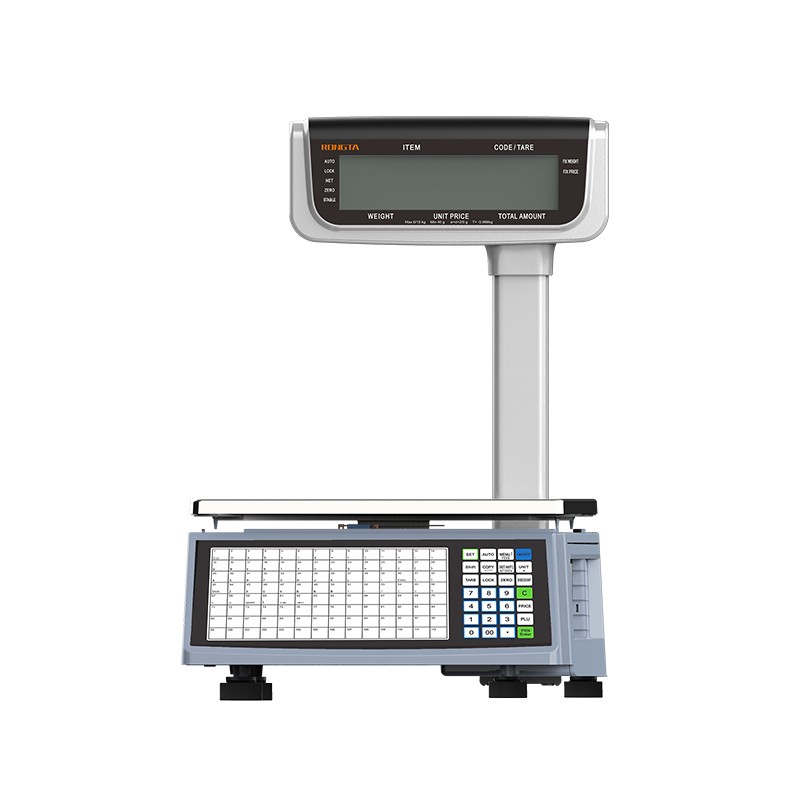 RLS1815C/RLS1830C Barcode Scale
 AURORA S2L-S Labelless Scale
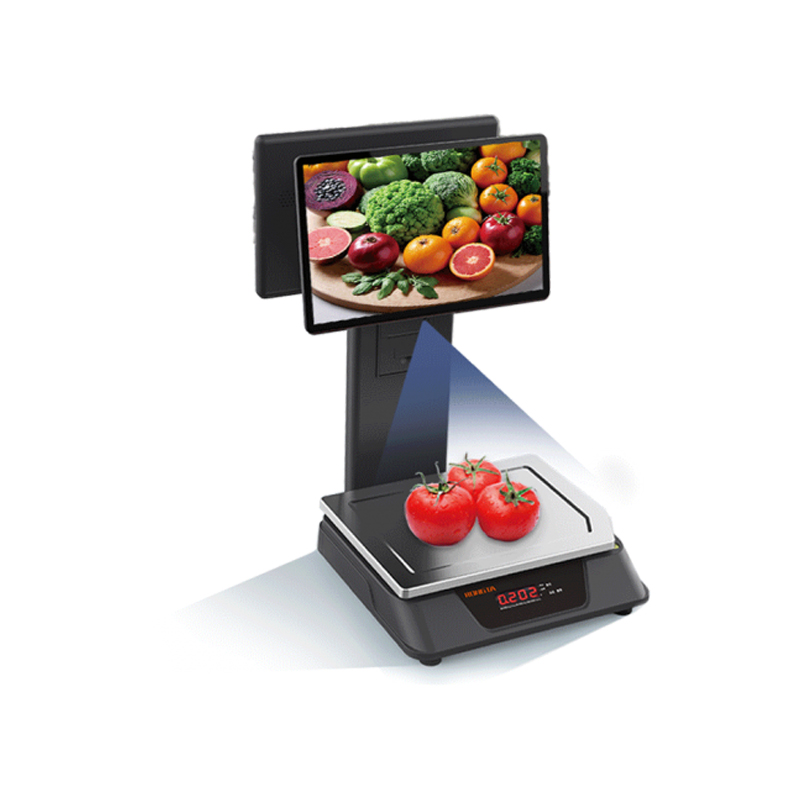 AURORA E1 PRO-AI Cash Register Scale
 AURORA S2L-AI Label Scale
 DP01-AI Smart Tag Cashier Dual-Use Scale
 C3 Weighing Scale
 C1 weighing scale
 C11 Weighing Scale
 retail
 FOOD
FOOD Medical
 Mobile office/home
 asset Management
 logistics
 Driver download
 User Manual
 Tool Download
 Tag software
 Product Video
 Development Documentation
 Frequently Asked Questions
 User Guide
 Company News
 Exhibition Updates
 Industry Insights
 Product Update
 General situation
 Development history
 Honors and Qualifications
 R&D strength
 Team activities
 Social responsibility