 80mm Receipt Printer
 ACE H2 Receipt Printer
 RP337 Receipt Printer
 RP336S Dual-Color Receipt Printer
 RP350 Receipt Printer
 RP582 Receipt Printer
 RP581 Receipt Printer
 ACE G1Y Receipt Printer
 ACE G1YP Cloud Printer
 RP216 2'' Dual-color High-definition Label Printer
 ACE V1S 3'' Backless Label Printer
 RP310D 3'' Dual-color Label Printer
 RP410N 4'' Thermal Label Printer
 RP425 4'' Electronic Waybill Printer
 RP422 4'' Electronic Waybill Printer
 RP421A 4'' Electronic Waybill Printer
 RP420 4'' Electronic Waybill Printer
 RI463 Series Barcode Printers
 RP400A 4'' Thermal Transfer Tape Cutter Printer
 RP400H 4'' Thermal Transfer Tape Cutter Printer
 RPF413 300dpi RFID barcode label printer
 RPP02A Portable Receipt Printer
 RPP02B Thermal Portable Printer
 RPP02C Portable Receipt Printer
 RPP02D Thermal Portable Printer
 RPP04 4" Portable Label Printer
 RPP30 3" Portable Label Printer
 ACE M1 2" Portable Label Printer
 RPP320N 3" Portable Label Printer
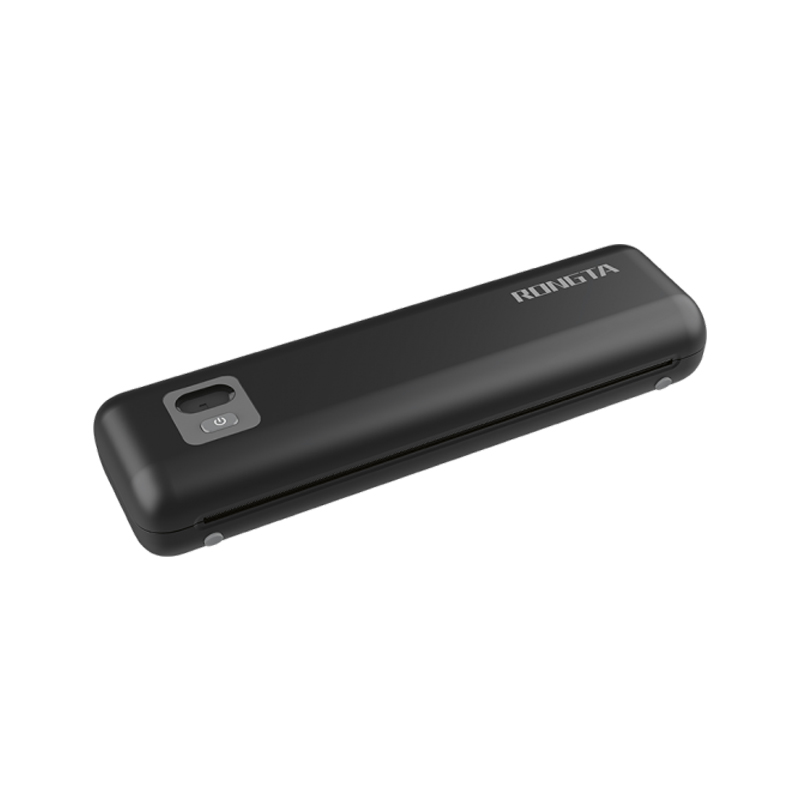 F82A A4 Front-Out Paper Tray Thermal Printer
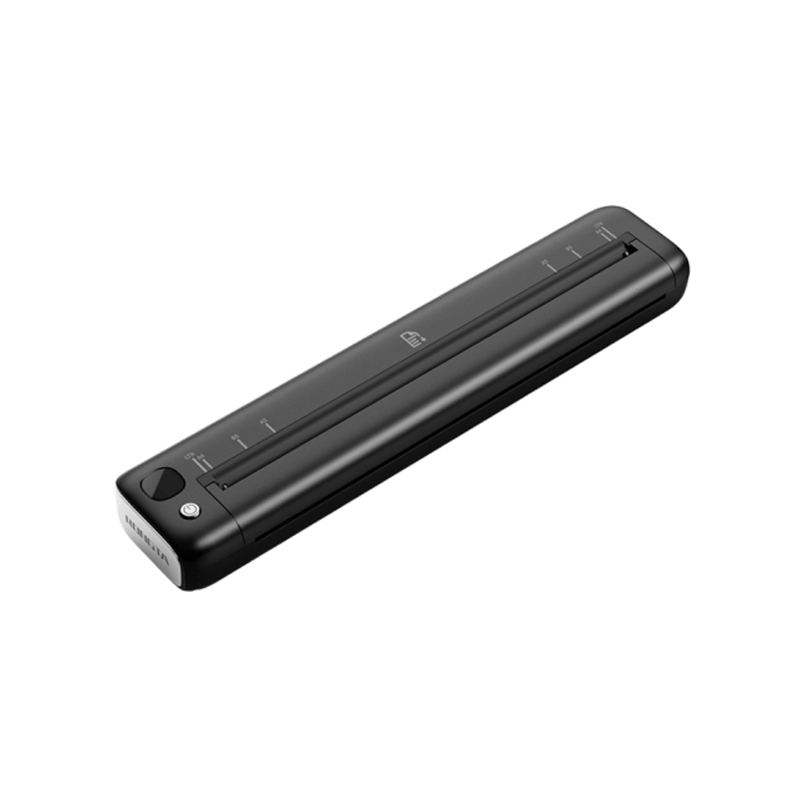 F81A Portable A4 Thermal Printer
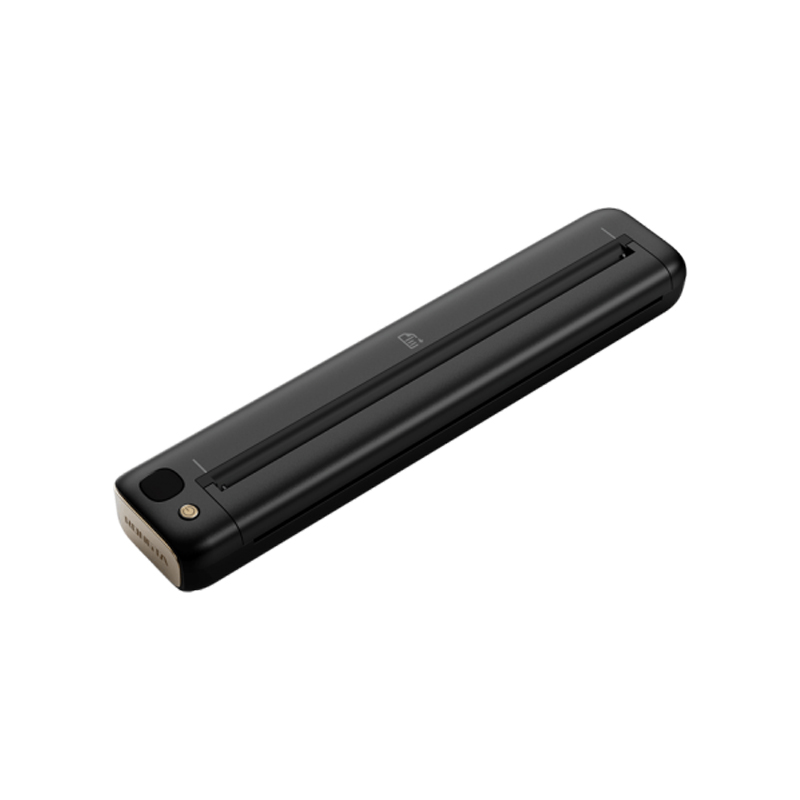 F81S Portable A4 Tattoo Printer
 Z1 Children's Educational Photo Printer
 R5 Mini Label Printer
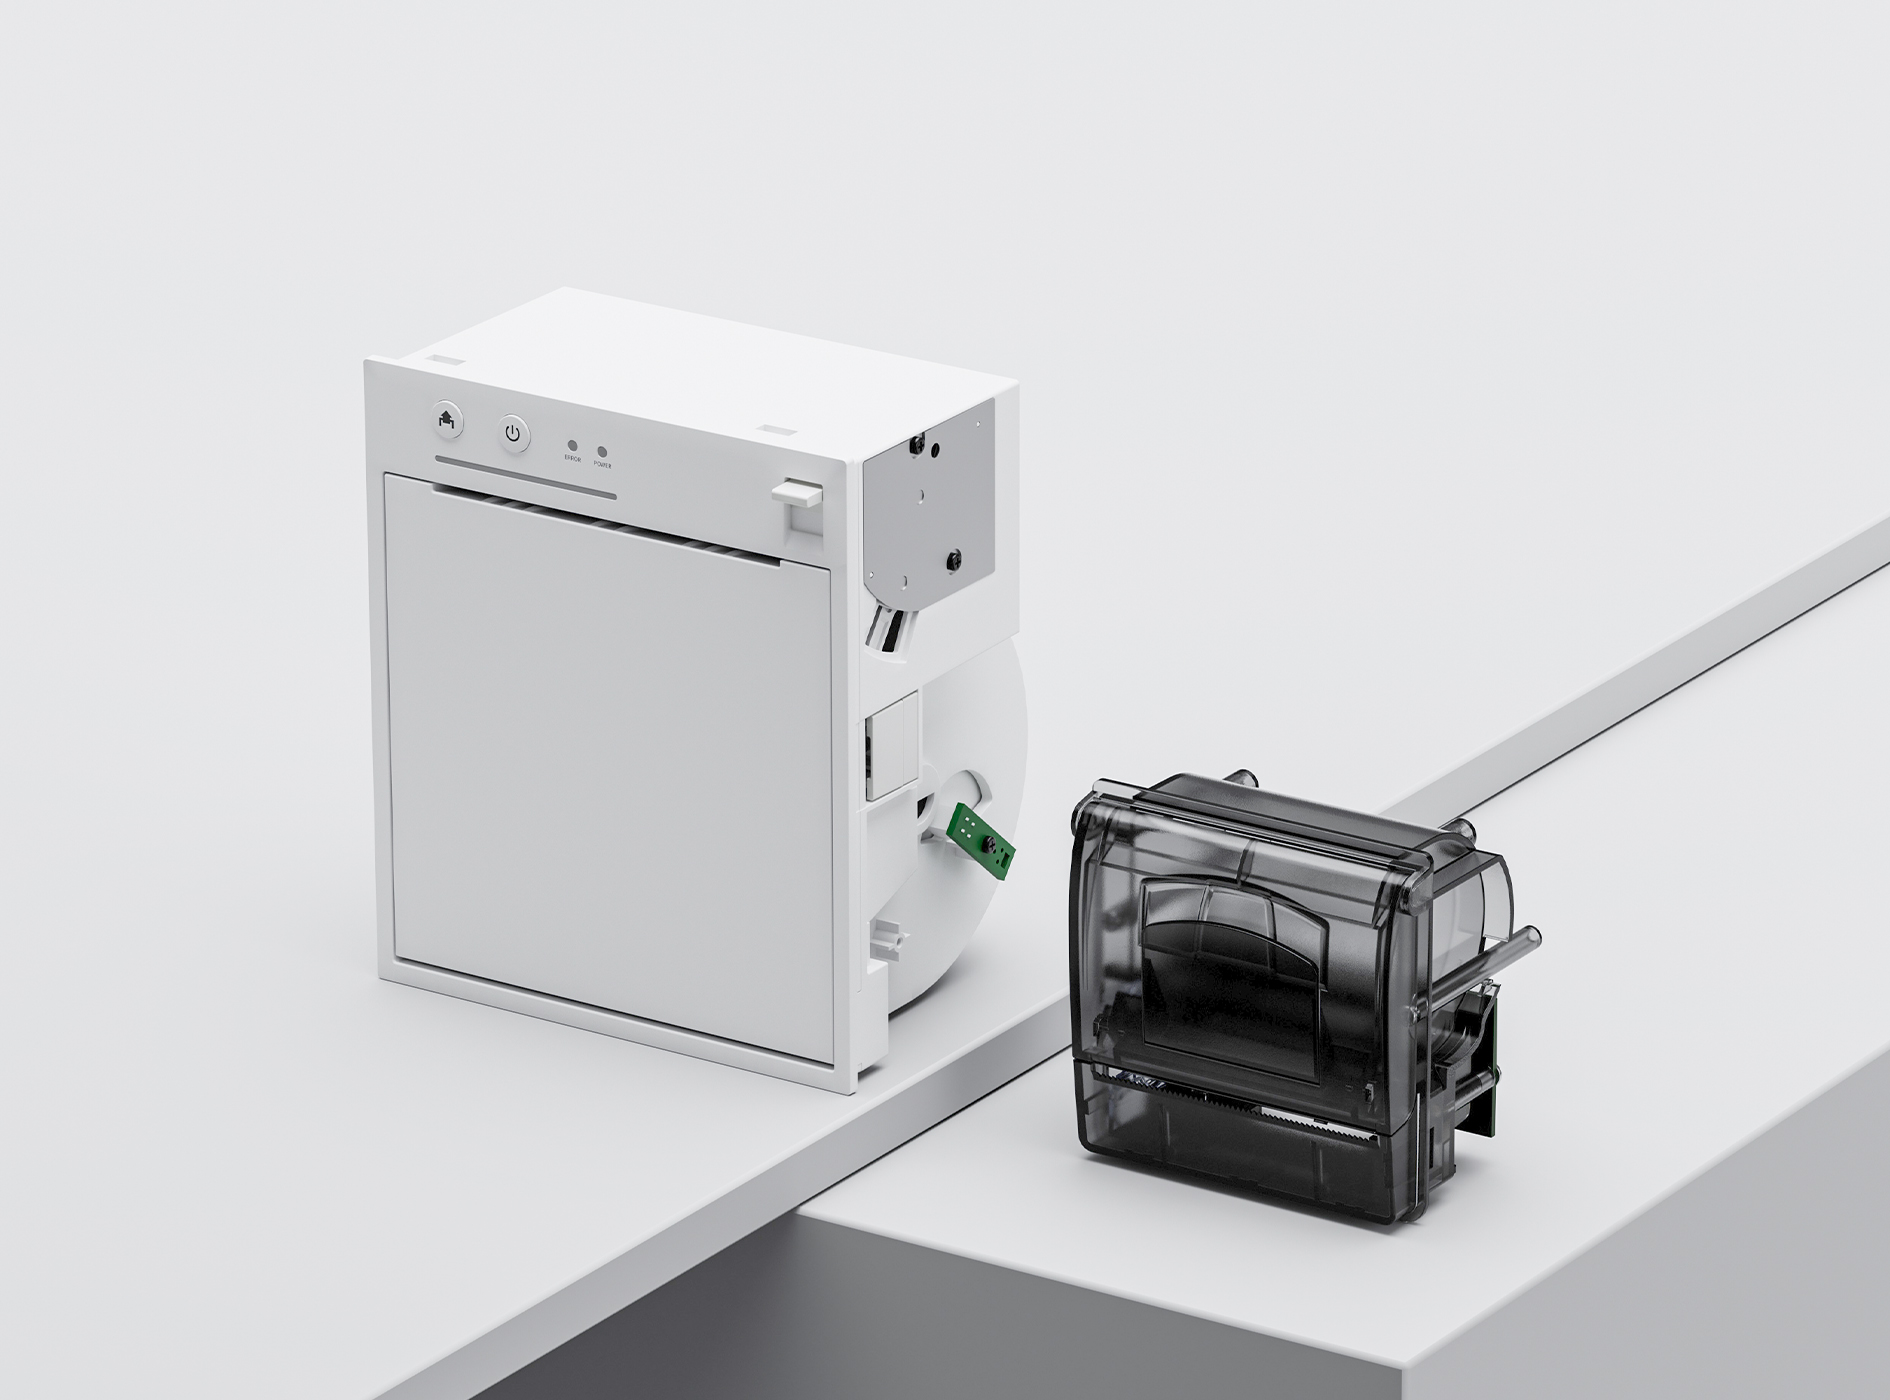
 RP07 58mm Embedded Printer
 RP203 58mm Embedded Printer
 PM315 Embedded Thermal Printer
 PM201 48mm Printing Module
 PM628 58mm printing module
 PM532A Printing Module
 PM532B printer module
 LS015/LS015A Barcode Scale
 RLS1815D/RLS1830D Barcode Scale
 RLS1815C/RLS1830C Barcode Scale
 AURORA S2L-S Labelless Scale
 AURORA E1 PRO-AI Cash Register Scale
 AURORA S2L-AI Label Scale
 DP01-AI Smart Tag Cashier Dual-Use Scale
 C3 Weighing Scale
 C1 weighing scale
 C11 Weighing Scale
 retail
 FOOD
FOOD Medical
 Mobile office/home
 asset Management
 logistics
 Driver download
 User Manual
 Tool Download
 Tag software
 Product Video
 Development Documentation
 Frequently Asked Questions
 User Guide
 Company News
 Exhibition Updates
 Industry Insights
 Product Update
 General situation
 Development history
 Honors and Qualifications
 R&D strength
 Team activities
 Social responsibility


RPP30 Portable Label Printer FAQ
RPP30 Portable Label Printer FAQsInstruction Manual
I. Basic Printer Operations:
1. Install the printer
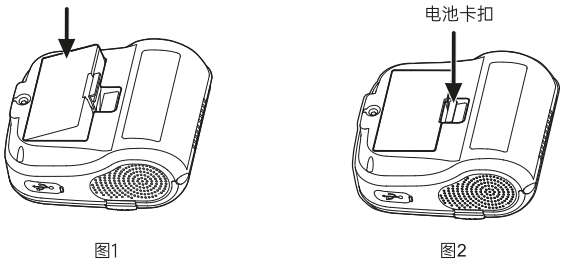
1.1 Battery Installation
(1) Ensure the printer is powered off when installing or removing the battery.
(2) As shown in Figure 2 below, when removing the battery, open the battery clip and use the reverse steps as when installing the battery.
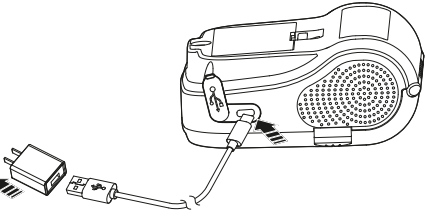
1.2 Battery charging
Standby charging:
Plug the power adapter into the power outlet and the USB port into the printer.
Charging interface AC: 100V-240V (50/60Hz).
Charging: The power indicator light and power display bar scroll to show the charging status.
Charging complete: The battery indicator icon shows full charge.
The buzzer will sound an alarm.
warn!
Using a power adapter that is not provided or approved by our company may damage the printer.
Do not remove the battery while it is charging.
Remark:
It can print while charging.
The device supports fast charging, allowing printing to continue after a short charge.
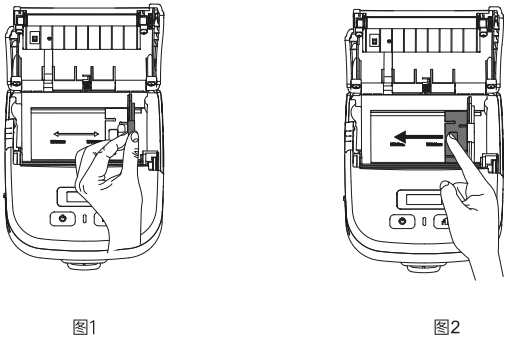
1.3 Paper width adjustment
Upward: Locks paper width adjustment; Downward: Unlocks paper width adjustment. Unlocking the paper width adjustment allows for paper width adjustment.The usage method is as follows:
(1) Adjust the paper width according to the paper width, and move it to the left by pinching the paper width baffle (as shown in Figure 1).
(2) Place your hand inside the paper roll slot and move the bottom part of the paper width adjustment block to the left (as shown in Figure 2).
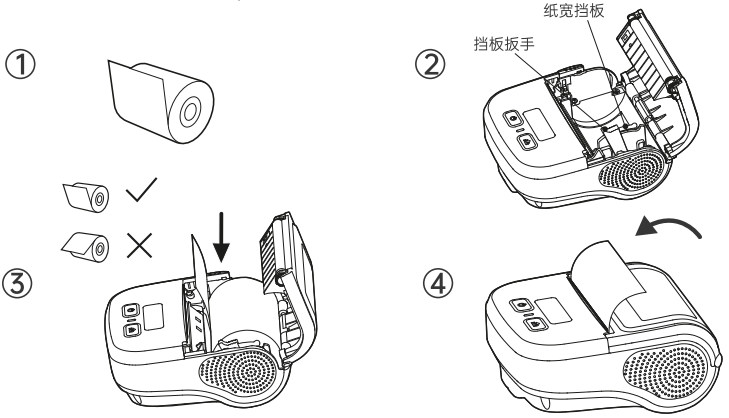
1.4 Printer Paper Installation Instructions
Printer paper roll installation:
(1) Remove the seal on the printer paper roll;
(2) Press the cover opening button to open the paper tray cover, move the baffle lever to release the lock, and initially adjust the paper width baffle to the paper width size;
(3) Place the paper roll into the paper hopper, fine-tune the paper width baffle to the paper roll, and move the paper width baffle wrench to fix it;
(4) Pull out a section of paper along the paper outlet and cover the paper tray with the cover.
Remark:
(1) Paper specifications for printer: paper width: 22-80mm (adjustable on one side), maximum paper roll diameter: 50mm.
(2) Pay attention to the direction of the paper roll. If it is rolled upside down, it will result in blank printing or paper feeding without paper.
15. Button Function Description
Power on:Press and hold the [Power] button for 3 seconds.
Power off:With the printer powered on, press and hold the [Power] button for 3 seconds.
Paper feeding:Briefly press the [Paper Feed] button (in continuous paper mode, pressing the [Paper Feed] button will feed the paper approximately 10mm).
In label/black label mode, press the [Paper Feed] button to feed the paper to the sewn label or to the black label.
Automatic sleep/wake-up:
Sleep Wake
If there is no button press or data transfer within 10 seconds while the printer is powered on.The printer will automatically enter sleep mode. Press the [Power] button or [...].Paper feed keyWake up the printer
Automatic wake-up
The printer will automatically wake up when it receives data.
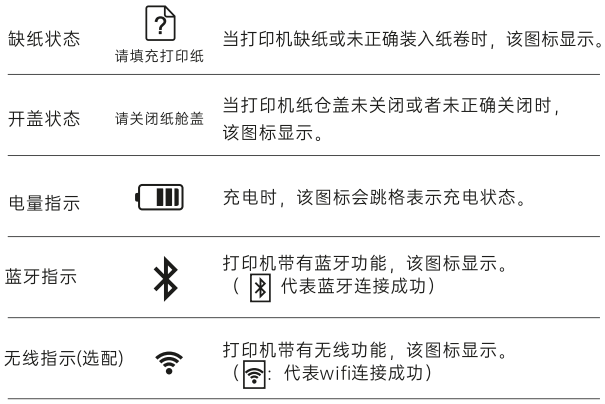
1.6 Screen Display Icon Description
?
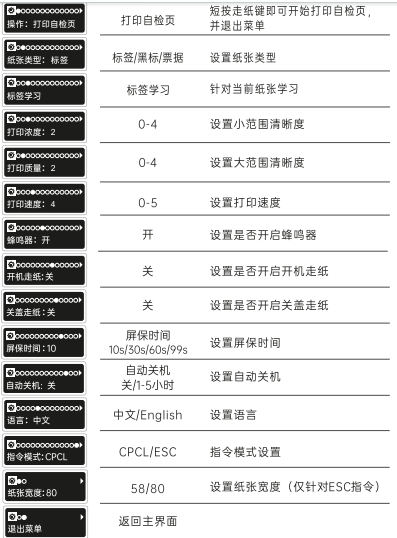
1.7 Function Description
In the power-on state (not in sleep mode), long press Settings/Press the paper feed button to enter the options interface.
Press the paper feed button to enter the options interface.
Press the paper feed button to enter the options interface.
Long press the Settings/Paper Feed button: Confirm settings and exit.
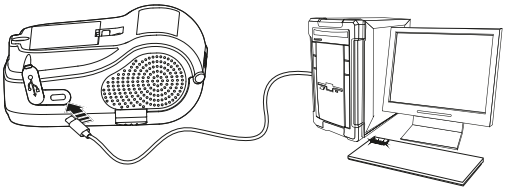
1.8 Connecting the communication interface
USB communication
The printer provides a USB port, which, when connected to a PC as shown in the picture, allows for charging, setting parameters, and transferring data.
Bluetooth communication
Bluetooth Name: RPP30-XXXX (last four digits of Bluetooth address)
Bluetooth password: 0000 (default)
(1)On an Android phone, first find the Bluetooth device in the phone's Bluetooth list.Device, click connect.Then you can connect using the app.
(2) Apple phones can connect directly through the app when printing.The printer connection interface will be displayed;
If a password input page appears, please enter the Bluetooth password: 0000.
WIFI communication (optional)
The portable label printer can provide WIFI communication, supports STA mode, supports TPIK/AES encryption, and has an effective communication distance of less than or equal to 20 meters.

II. Common Problems and Solutions:
2.1 Print blank
(1) The paper roll is reversed; please reinstall the printing paper in the opposite direction.
(2) Incorrect instruction type: The type of instruction issued by the software does not match the type of instruction issued by the printer. Print a self-test page to check the type of instruction issued by the printer. Switch to the instruction mode interface by pressing the button and modify it to match the type of instruction issued by the software.
2.2 Blurry and unclear printing, loud paper output noise
The print head and rollers need to be cleaned (see Daily Cleaning and Maintenance for cleaning steps).
2.3 Continuous feeding of white paper
(1)Press and hold the [Paper Feed] button to learn the labels;
(2)Enter the settings interface to learn about tags.
2.4 Unable to boot
(1) The battery is low. Please connect the power cord to charge it.
(2) If the device still cannot be turned on after charging, please contact Rongda after-sales service for repair.
III. Daily Cleaning and Maintenance
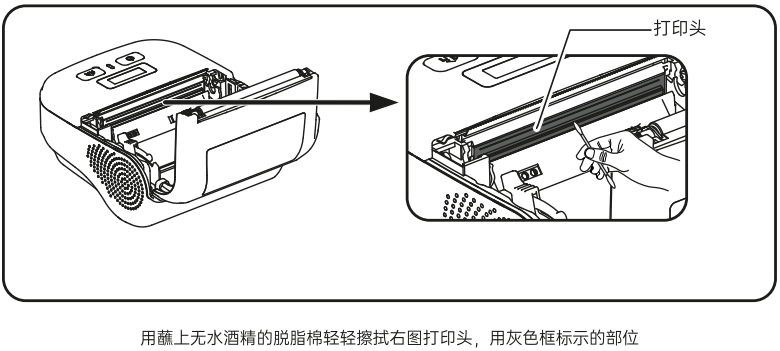
(1) The print head and roller must be cleaned regularly, especially when the print quality is blurry.
The steps for cleaning the print head are as follows:
Turn off the printer, open the top cover, and remove any paper if present.
If printing has just finished, wait for the print head to cool completely;
Wipe away dust and stains from the printhead surface with a soft cotton cloth dampened with alcohol;
After the alcohol has completely evaporated, close the top cover and try printing again.
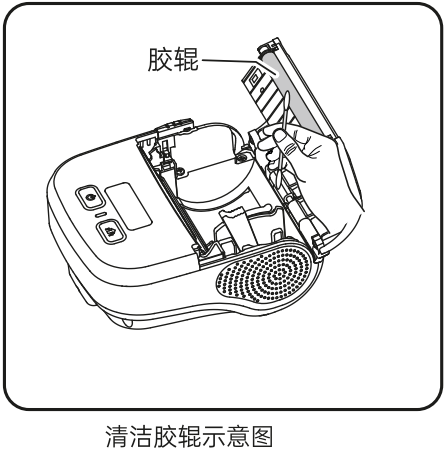
The steps for cleaning the rubber rollers are as follows:
Turn off the printer and open the top cover;
Wipe the printing roller with a soft cotton cloth dampened with neutral alcohol;
After the alcohol has completely evaporated, close the lid.
(2)If water is found inside the printer, turn it off immediately, remove the battery, and let the printer air dry.
(3)If the printer will not be used for an extended period of time, please remove the batteries and store them separately.
(4)Cleaning the printer exterior and paper tray: Gently wipe the printer surface and the inside of the paper tray with a wrung-out damp cloth. Make sure the cloth is completely wrung out.
V. After-sales contact information
1.400 Technical Support:
Hotline: 400-800-0596. After dialing 400, press dial 2 for label printer service support.
Working hours: 9:00 AM - 8:30 PM (6:00 PM on weekends and public holidays)
2. After-sales repair method:
Recipient: After-sales Service Department Phone: 15359340780
Address: Rongda Science and Technology Park, No. 88 Tonghui South Road, Tongan Industrial Concentration Zone, Xiamen City, Fujian Province
Return Repair Instructions: When returning the device for repair, please include the return address, contact information, a list of all items packed in the box, and a detailed description of the malfunction in the package. This will help improve the efficiency of the return process. Thank you for your support! If no information is provided, the device will be returned according to the sender's information.