 80mm Receipt Printer
 ACE H2 Receipt Printer
 RP337 Receipt Printer
 RP336S Dual-Color Receipt Printer
 RP350 Receipt Printer
 RP582 Receipt Printer
 RP581 Receipt Printer
 ACE G1Y Receipt Printer
 ACE G1YP Cloud Printer
 RP216 2'' Dual-color High-definition Label Printer
 ACE V1S 3'' Backless Label Printer
 RP310D 3'' Dual-color Label Printer
 RP410N 4'' Thermal Label Printer
 RP425 4'' Electronic Waybill Printer
 RP422 4'' Electronic Waybill Printer
 RP421A 4'' Electronic Waybill Printer
 RP420 4'' Electronic Waybill Printer
 RI463 Series Barcode Printers
 RP400A 4'' Thermal Transfer Tape Cutter Printer
 RP400H 4'' Thermal Transfer Tape Cutter Printer
 RPF413 300dpi RFID barcode label printer
 RPP02A Portable Receipt Printer
 RPP02B Thermal Portable Printer
 RPP02C Portable Receipt Printer
 RPP02D Thermal Portable Printer
 RPP04 4" Portable Label Printer
 RPP30 3" Portable Label Printer
 ACE M1 2" Portable Label Printer
 RPP320N 3" Portable Label Printer
 F82A A4 Front-Out Paper Tray Thermal Printer
 F81A Portable A4 Thermal Printer
 F81S Portable A4 Tattoo Printer
 Z1 Children's Educational Photo Printer
 R5 Mini Label Printer
 RP07 58mm Embedded Printer
 RP203 58mm Embedded Printer
 PM315 Embedded Thermal Printer
 PM201 48mm Printing Module
 PM628 58mm printing module
 PM532A Printing Module
 PM532B printer module
 LS015/LS015A Barcode Scale
 RLS1815D/RLS1830D Barcode Scale
 RLS1815C/RLS1830C Barcode Scale
 AURORA S2L-S Labelless Scale
 AURORA E1 PRO-AI Cash Register Scale
 AURORA S2L-AI Label Scale
 DP01-AI Smart Tag Cashier Dual-Use Scale
 C3 Weighing Scale
 C1 weighing scale
 C11 Weighing Scale
 retail
 FOOD
FOOD Medical
 Mobile office/home
 asset Management
 logistics
 Driver download
 User Manual
 Tool Download
 Tag software
 Product Video
 Development Documentation
 Frequently Asked Questions
 User Guide
 Company News
 Exhibition Updates
 Industry Insights
 Product Update
 General situation
 Development history
 Honors and Qualifications
 R&D strength
 Team activities
 Social responsibility


Installation and Operation of a 76mm Dot Matrix Receipt Printer
76mm dot matrix receipt printerInstallation and operation
1. Printer connection method
(1) Ensure that both the printer and the PC host are turned off. Plug the matching data communication cable into the printer's data port, and plug the other end (e.g., a 9-pin connector for serial cables and a 25-pin connector for parallel cables) into the PC host's serial/parallel/USB port.
(2) If the cash drawer is equipped with an electrically openable cash drawer, plug the RJ-11 connector on the cash drawer into the cash drawer port of the printer (the cash drawer must be compatible with the printer’s cash drawer drive specifications).
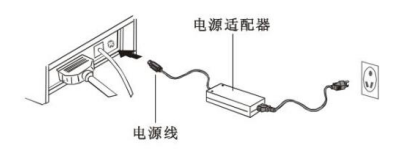
(3) Connect the printer's dedicated power adapter. Please use the dedicated power adapter included with the printer. The connection diagram is shown below:
Notice:
(1) First, plug in the printer's power cord (DC24V), then connect it to the AC220V power supply, and then turn on the power switch. Do not reverse the order, otherwise the machine will be damaged.
(2) Using an inappropriate power adapter can degrade print quality or even damage the printer.
(3) Do not connect the telephone line to the cash drawer interface, otherwise the printer and telephone may be damaged.
(4) When plugging or unplugging the printer power cord, hold the printer power connector by the arrow (do not hold the printer power cord by the cord itself). Forcibly pulling the printer power cord may damage the printer or power adapter.
?
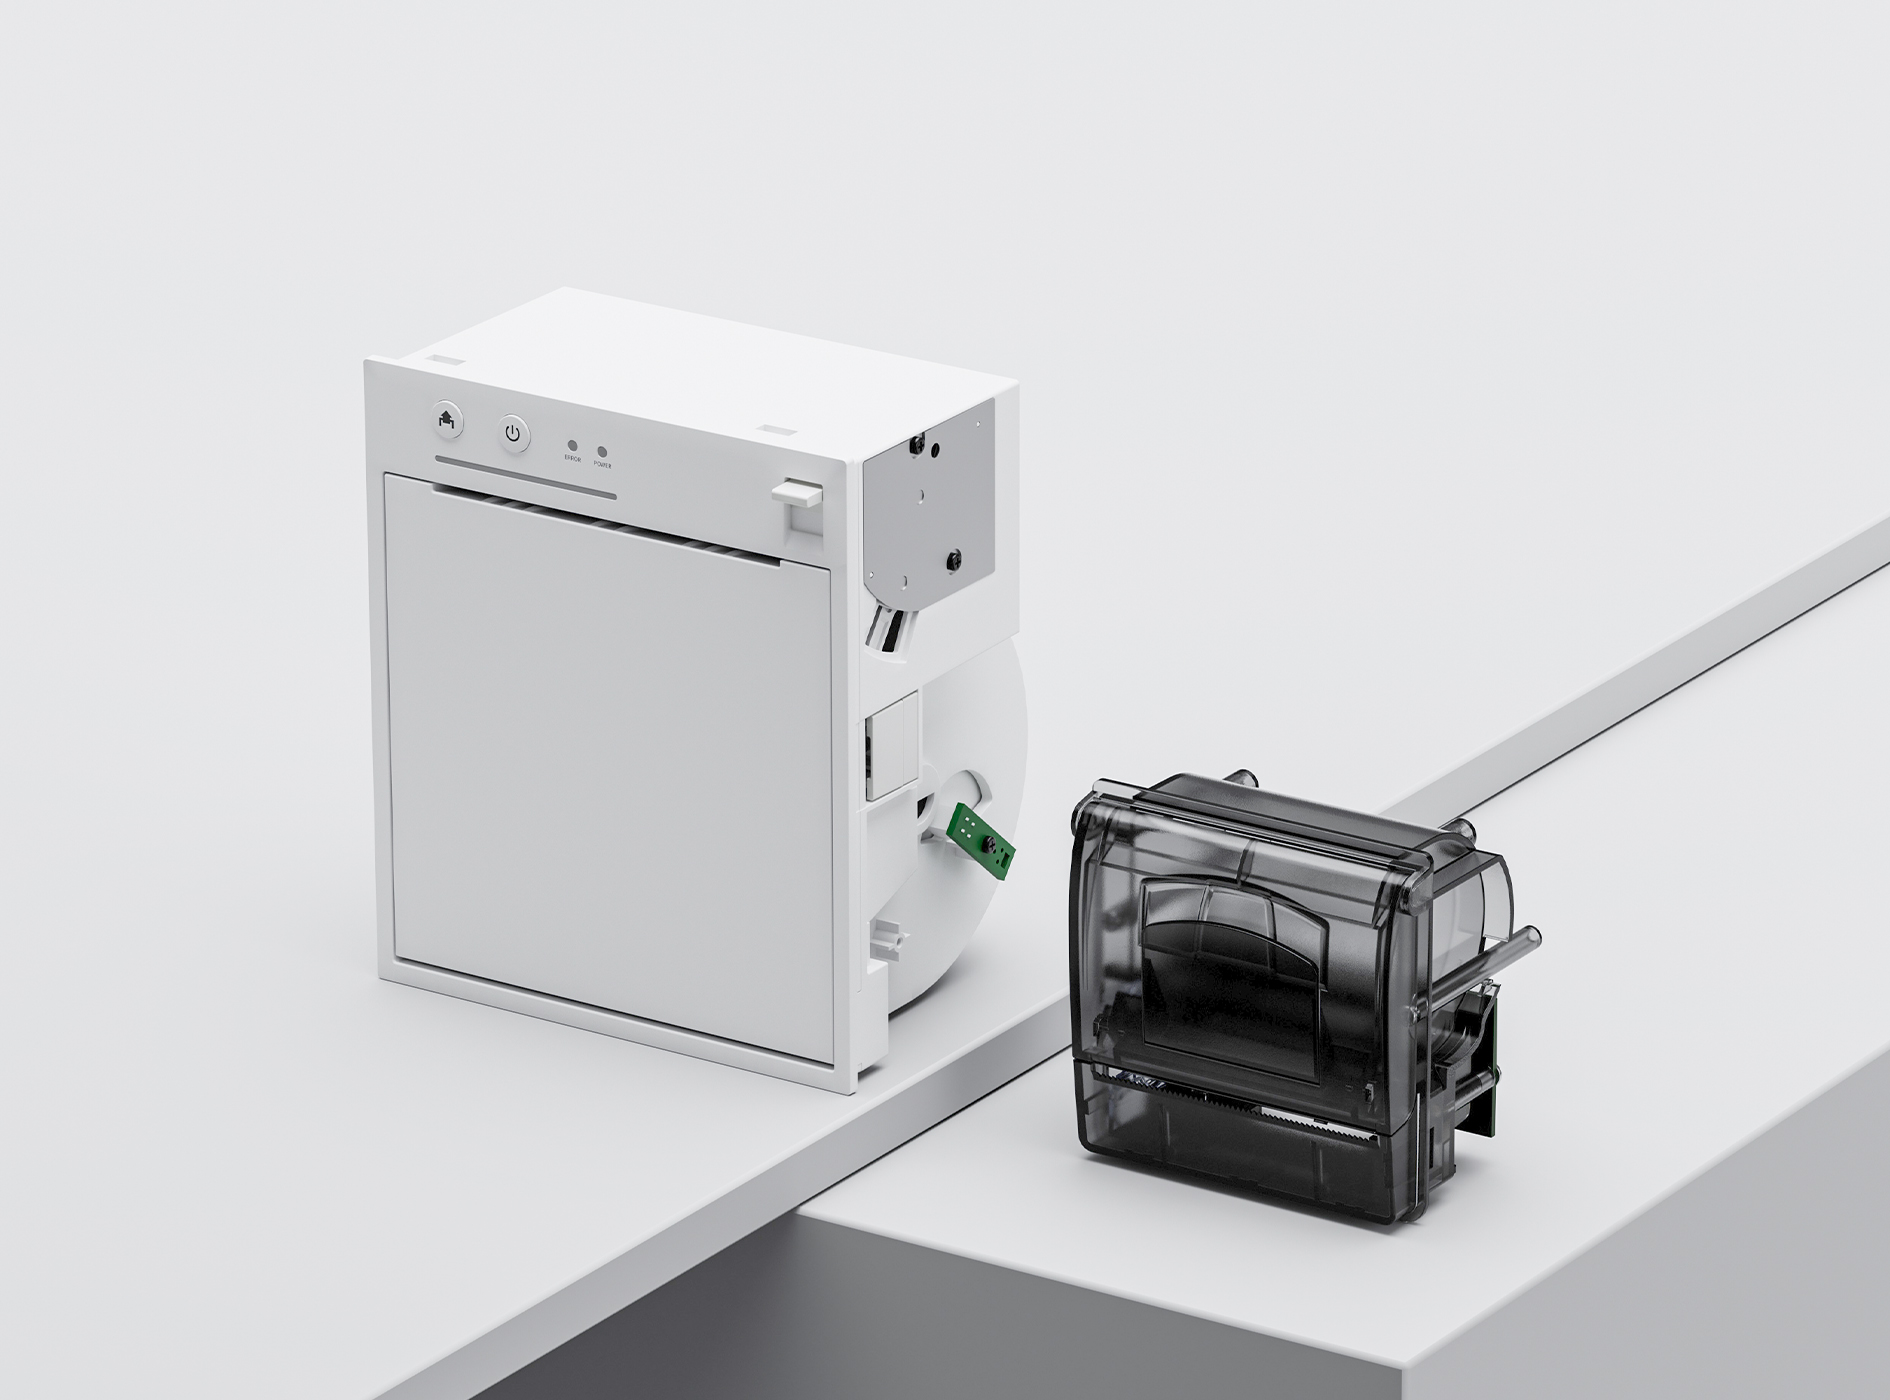
2. Installation of paper rolls
The 76mm series printers use 76mm high-quality single-sheet plain continuous paper or 2-3 sheet self-copying paper, and feature an automatic paper loading mechanism or automatic paper suction function, making paper loading very convenient.
Detailed operating instructions:
When the paper sensor detects no paper, the ERROR and PAPER indicator lights remain on, and the buzzer sounds three times at one-second intervals, indicating that the printer is waiting to load paper. During the paper loading process, when the paper sensor detects paper again, both the ERROR and PAPER indicator lights turn off, and the paper feed motor starts, allowing the printer to automatically feed paper. After paper feeding is complete, the ERROR indicator light flashes. At this point, pressing the FEED button confirms paper feeding; both the ERROR and PAPER indicator lights turn off, the buzzer stops, and the printer enters ready mode.
Notice:
When feeding paper (do not use paper stuck to the paper roll core, otherwise the printer will not be able to correctly detect the end of the paper and will damage the printer), trim the paper end and align it with the paper feed slot, then insert it vertically by holding both sides of the paper and inserting it into the paper tray until the paper feed motor starts turning and the printer will feed the paper automatically. If the paper end gets stuck in the paper feed slot and a paper jam occurs, wait for the automatic paper feed motor to stop and then pull the paper back out. Trim off any wrinkles at the paper end and re-feed the paper.
The requirements and orientation of the paper roll when inserting it are shown in the following figure:

If the paper roll is not yet finished and you need to remove it, please follow the steps below. Do not pull out the paper that is already inside the roll from the paper feed slot.
The operation method is as follows:
(1) Open the printer cover.
(2) Pull up the paper from the paper feed and cut the pulled-up paper.
(3) Remove the paper roll from the printer.
(4) Press the paper feed button to remove the remaining paper (do not pull the remaining paper from the opposite direction of the paper feed direction).
?
3. Installation of ribbon
Always use genuine ink ribbons; do not use generic or inferior ribbons, as this will shorten the lifespan of the printhead. Before replacing the ribbon, ensure the printer is not receiving data; otherwise, data will be lost.
The procedure for installing the ribbon is as follows:
(1) Open the printer cover.
(2) Turn the ribbon cartridge knob in the direction of the arrow on the ribbon to tighten the loose part of the ribbon.
(3) Insert the ribbon into the print head and push the ribbon cartridge until it is locked.
(4) Rotate the ribbon cartridge knob 5 to 6 times in the direction of the arrow on the ribbon to tighten any loose parts of the ribbon.
?